
It's no secret that I LOVE mini quilts, is it? My collection is growing, my walls are shrinking and my heart is happier. When I look around the walls of my sewing room, I see my friends. I think that's what I love the most about mini quilts. They're fast, fun and so darn satisfying to make. I mean hey-you can say you completed an entire quilt in a day!

My second project as a tutorialist for Anna Griffin is for a Chalkboard Mini Quilt. I think it is super adorable, and I'm pretty sure you will too. If you're not sure where to buy chalkcloth, check out Laminates and Fabric Shoppe, both on Etsy.
For this tutorial, I used Modern Eclectic by Khristian Howell. You can view the entire collection here.

You will need:
*One Fat Quarter of Chalkcloth cut down to 12 3/4"x15 3/4"
*Two squares each of seven different fabrics cut into 2 3/4" squares
(or fourteen 2 3/4" squares)
*One Fat Quarter of an accent fabric cut into two 2 3/4"x22" strips and an applique motif
*One Fat Quarter cut into Four 3 1/2" strips for non-continuous binding
1/2 yard of backing fabric
*scrap of Warm 'N Natural batting measuring approximately 25"x25"
*thread
*rotary cutter/mat/acrylic ruler
**seam allowance is 1/4" unless otherwise noted**
Let's do this:
If you'd like to add an applique to your chalkboard, find a motif in your accent fabric that you like and cut around it, leaving approximately 1/4" all the way around it. My floral motif was on the corner of my fabric, so I decided to put it in the corner of the chalkboard, and trimmed my edges nice and square to fit. Decide where you want your applique to be based on the size and location of your motif on the fabric.

Carefully pin the applique to the chalkcloth, you don't want pinholes to be seen on your finished project, so make sure the pins are on the inside edge of the applique.

Edge-stitch around the applique:

I like to go around a few times to give it a more decorative look.

Cut your fabrics into 2 3/4" squares, if you haven't already done so.

Arrange the squares into rows (keep in mind that they will be attached to the sides of the chalkboard). Stack them into two rows, and stitch. Press your seams to the sides (or use whichever method you prefer. I like the one described here where you press towards every other square/strip.)

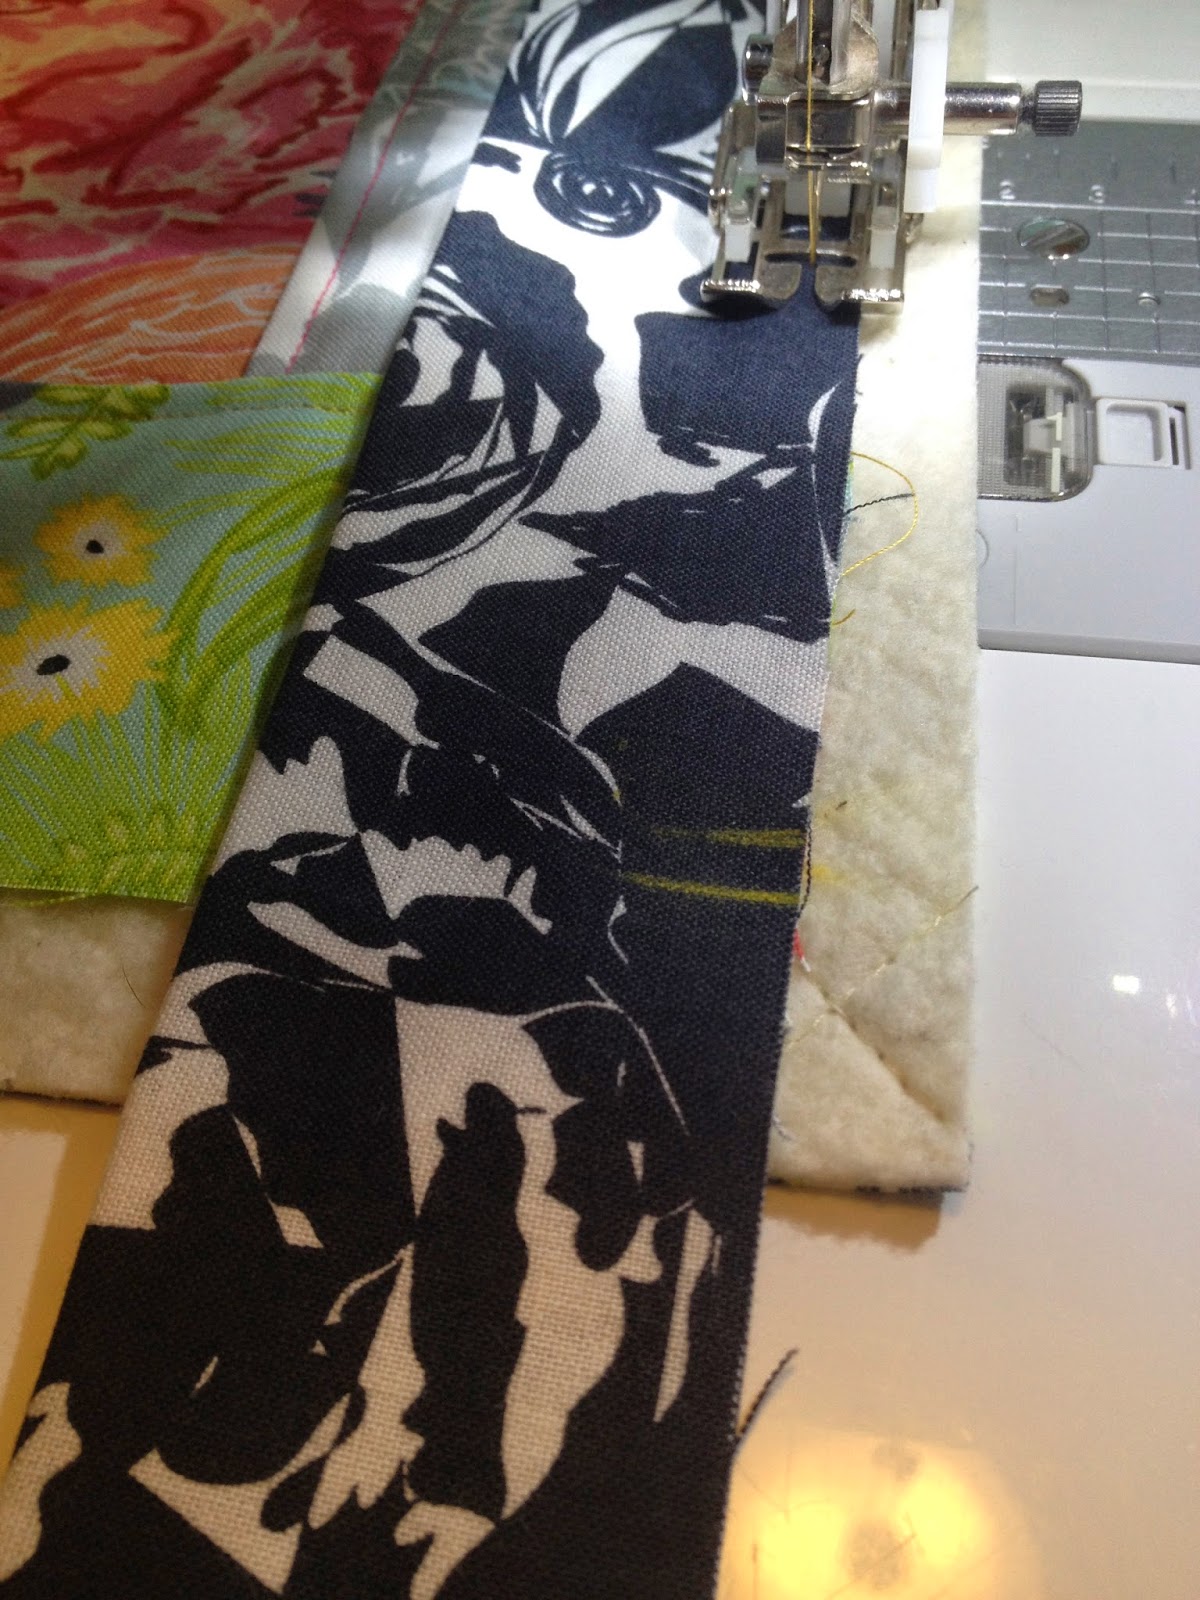
With right sides together, lay one strip on one side of the chalkcloth
and stitch; repeat for the other side/strip.


*One Fat Quarter of Chalkcloth cut down to 12 3/4"x15 3/4"
*Two squares each of seven different fabrics cut into 2 3/4" squares
(or fourteen 2 3/4" squares)
*One Fat Quarter of an accent fabric cut into two 2 3/4"x22" strips and an applique motif
*One Fat Quarter cut into Four 3 1/2" strips for non-continuous binding
1/2 yard of backing fabric
*scrap of Warm 'N Natural batting measuring approximately 25"x25"
*thread
*rotary cutter/mat/acrylic ruler
**seam allowance is 1/4" unless otherwise noted**
Let's do this:
If you'd like to add an applique to your chalkboard, find a motif in your accent fabric that you like and cut around it, leaving approximately 1/4" all the way around it. My floral motif was on the corner of my fabric, so I decided to put it in the corner of the chalkboard, and trimmed my edges nice and square to fit. Decide where you want your applique to be based on the size and location of your motif on the fabric.
Carefully pin the applique to the chalkcloth, you don't want pinholes to be seen on your finished project, so make sure the pins are on the inside edge of the applique.
Edge-stitch around the applique:
I like to go around a few times to give it a more decorative look.
Cut your fabrics into 2 3/4" squares, if you haven't already done so.
Arrange the squares into rows (keep in mind that they will be attached to the sides of the chalkboard). Stack them into two rows, and stitch. Press your seams to the sides (or use whichever method you prefer. I like the one described here where you press towards every other square/strip.)
With right sides together, lay one strip on one side of the chalkcloth
and stitch; repeat for the other side/strip.
Trim off any excess chalkcloth, if there is any.
Finger press the seams out.
(Chalkcloth cannot be ironed)
Doesn't that look nice so far?
With right sides together, stitch the 2 3/4" accent strip to the top edge of the chalkboard;
repeat for second strip and bottom edge.
Trim excess fabric from top and bottom.
Finger press strips away, and top-stitch all the way around the edge of the chalkcloth.
Yay! The top of your Chalkboard Mini Quilt is done! Now let's work on getting it finished.
Lay the wrong side of the finished quilt top on your scrap of batting, then lay this on the wrong side of the quilt backing, creating a "quilt sandwich". Using your rotary cutter, cutting mat and acrylic ruler, cut the batting/backing 1/2" larger all the way around; set top aside but do not separate the batting and backing.
Quilt the backing and batting together.
Sometimes I like to draw a design on the fabric with a fabric pen, as seen here.
When the quilting is finished, replace the quilt top, wrong side down, on top of the batting making sure it is squared up with 1/2" batting on every side.
Fenway Frank decided to take a nap on the ironing board. Hmmm...probably not the best place for a nap, eh, Frankie?
Now for the coolest binding method EVER
Non-continuous binding. Say what? Just take a look. It's life changing.
Ready? Here we go:
Begin by ironing the length of the strips, wrong sides together.
Align raw edges of binding with raw edge of quilt top (you should see the 1/2" of extra batting sticking out) making sure you have an extra couple of inches hanging off the top edge. Measure inside the quilt top 1/4" from each edge and make a mark on the binding.
This will be your starting and stopping point.
 |
| ignore the first yellow mark, I made a mistake and measured 1/2" |
Stitch the binding down, making sure to backstitch at both marks.
Flip the binding off to the side, creating a 45* angle. Align the second binding strip with the edge of the quilt top, and binding tail; stitch in the same manner as before, making sure to stop and backstitch 1/4" from the edge of the quilt top.
Again, flip the binding tail away from the quilt and repeat for remaining binding pieces.
Now for those perfect mitered corners.
Place your acrylic ruler on the binding and measure the distance between the fold and the seam line.
Mine was 1 1/2":
Divide that measurement in half (for me it was 3/4") and make a mark.
From the mark, measure 3/4" straight up (towards the binding tails) and make another mark.
Connect your second mark to each seam line:
Pin the bindings together on these marks. Pull the binding away from the quilt and stitch directly on the lines, making sure to back stitch when starting and stopping.
Trim excess binding from stitched lines:
Turn corners out, using a chopstick or metal bodkin to poke corners out, tuck quilt corner in. Repeat for remaining corners. When you're finished, press binding out, wrap around to the back of the quilt; press again. Pin binding in place and stitch however you prefer. I personally love hand stitching, but feel free to get it done whichever way makes you happiest!
You are finished! Don't you love it? Now go hang it up somewhere and start a grocery list or a daily happy note to your family. Did I give you enough time to whip one up for Mother's Day?
Happy quilting!
-Kristi-
I have been tempted to buy some chalkboard fabric and now I'm convinced that I need some! Thanks for the tutorial. I just found your blog through Instagram. I'll be signing up for your mini-quilt swap next!
ReplyDeleteJulie @ The Crafty Quilter
Thank you, Julie! I have a Flickr group if you'd like to share what you make from the tutorial. I'd love to see what you create!
Deletehttps://www.flickr.com/groups/2215362@N23/
This is so cute! Thanks for.sharing, going to.pin for a future project
ReplyDeleteThank you so much, Donna!
DeleteI've had a piece of chalkboard fabric for years, just waiting for the right project. This is it! Thanks for sharing!
ReplyDelete