Wednesday, November 30, 2011

It's A Marshmallow World


I love marshmallows.  I love 'em covered in chocolate, rolled in coconut, dunked in hot chocolate, straight out of the bag, smooshed between graham crackers and I even love those little dehydrated ones in my cereal. So, naturally, one of my very favorite Christmas songs is "A Marshmallow World", which I had never heard until a few years ago.  It ranks up there with that hippopotamus song, and "All I Want For Christmas Is My Two Front Teeth".

In the spirit of the holidays, and the fact that we seem to be out of anything yummy to eat in this house, I made marshmallows.  I don't remember where I got the recipe, but I'm going to share it with you anyway.  You should definitely make them this year.  They are amazing by themselves and totally out of this world in a cup of hot chocolate.  In fact, what a thoughtful holiday gift for someone on your list!  Wouldn't it be nice to receive a basket with mugs, cocoa mix, a few candy canes and a bag of homemade marshmallows?  Add in a movie and some popcorn and you've just given an awesome night out at home!  Enjoy!

-Kristi-

PS What is your favorite holiday treat?


Homemade Vanilla Marshmallows
makes about 40 1 1/2" super yummy treats

2 1/2 Packets of unflavored gelatin
1 cups cold water
1 1/2 cups sugar
1 cup light corn syrup
1/4 teaspoon salt
2 tablespoons vanilla extract
powdered sugar

1.) Whisk gelatin and 1/2 cup water in your mixer's bowl.  Let sit for about 30 minutes while you are working on the next step.
2.)In a small pot with candy thermometer attached to the inside, mix remaining water, sugar, corn syrup and salt over low heat until sugar is dissolved.  Once sugar is dissolved, turn the heat up to high and cook, stirring constantly, until temperature has reached 244*, the firm ball stage. Immediately remove from heat.
3.) Working quickly, transfer sugar mixture to gelatin.  Beat slowly until evenly combined.  Gradually increase the speed of your mixture to high (between 6-8 on a Kitchenaid) and let beat until mixture has tripled in volume.  This will take about 15 minutes. (While you are waiting, be sure to soak your pan and utensils in hot soapy water!)  Add vanilla carefully as it tends to splatter.
4.) Dust the bottom of a lasagna pan with powdered sugar.  Pour mixture into pan and spread evenly.  Dust top with powdered sugar, coconut, sprinkles, cocoa, chopped nuts, mini chocolate chips etc.  You may also choose to add one of these to the bottom of the pan after dusting with powdered sugar. Let stand uncovered for several hours (or overnight).  Cut into 1 1/2" squares, toss in powdered sugar or sprinkles or whatever you used on top and bottom.

*Since my marshmallows are still in the "overnight" stage, I'll come back and edit this post with pictures after the marshmallows are finally cut.

Thursday, November 17, 2011

Turkeys and Toddlers

The Roo is just getting to the age where crafting is possible.  She has her own sewing machine, loves to draw with crayons and markers and she is all over the whole "making a mess" thing.  So, with Thanksgiving right around the corner and an antsy toddler in the house, I decided to give crafting a shot.  After browsing Pinterest for easy Thanksgiving related crafts, we finally settled on a construction paper hand/footprint turkey, an idea that originated here.  That link, of course has it's own instructions, but I thought it would be more fun to see the project come to life with The Roo.  Are you ready?  Here we go:

Gather up all of your supplies, crafting with an almost three year old is already a precarious project so its best to be sure you're READY!  You will need:
-Pencil or pen
-Paper Scissors
-Construction or scrapbook paper in brown, orange, red and yellow (or whatever color you want your turkey to be, we didn't stray too far away from the original)
-Googly eyes, pom poms, buttons, sequins, rhinestones etc for eyes and other decorations-if your toddler can sit still through the entire project...mine was ready to be done before we could Bedazzle the heck outta those tail feathers, but c'est la vie...there's always Christmas!
-Washable glue and a glue stick
-Popsicle sticks, optional-we didn't use them, but had them just in case


I discovered that small children are like magpies-if there's something tiny and shiny (like a sequin or rhinestone, for example) they will jump in (sticky fingers first) with all the gusto of a kitten in a yarn shop and those sequins will go flying faster than The Blue Angels.  I learned this one the hard way, yikes.  Here's how to avoid that:

Put all those pretty, tiny and sparkly things in a container to keep them separate and well, contained

Next, have your child trace her hand, if she's able to, or you can do it for her.  Remy is all about having her hands traced so this was extra fun.  Be sure to trace both left and right on all three colors:


Once you've got her hands traced, it's time to trace a foot.  This was an especially good time for Roo because I allowed her to stand on the table for it!  (GASP!!  The unthinkable, Mom!!  Let's do it!!)


So, now you have all the pieces to make your turkey.  To avoid your little one getting antsy while you're busy cutting out their feet and hands, give them a pencil and some paper and let them trace their hands.  This will take them some time and will allow you to get everything cut out (hopefully)-especially if you have an extra pair of fancy-cutting scissors to let them use.


Once everything is ready, it's time to assemble the turkey!  Turn the foot print upside down, so that the heel is the head.  Have your little one arrange the handprints however they want to make the tail feathers:

When it is arranged to her satisfaction, use your glue stick on the back of the foot and press in place on top of the hands.
Now it's time to give your turkey a face and some legs!  I found it easiest (and cleanest) to have your child point to the spot where they want you to apply the glue for the eyes and mouth.  Don't get too picky about it being perfect, it's their creation and this is how they're using their imagination. 

Cut out a triangle on the fold of a scrap of yellow for the beak

Add a dab of glue for the wattle (a yellow sequin, in our case)


And then finally, give your turkey some legs and feet.  The Roo really wanted to use some green scraps from her hand print cutting and a couple of snowflake sequins for the feet.


We used the hand print that she traced and cut to write her name and the date on and then attached it to the back of the turkey.  Since it was part of the project, we wanted to include it. 
She was so proud of her turkey!  We're going to display it at the Thanksgiving table for all of our guests to see. 
I am sure we will be doing at least one more Thanksgiving craft this week.  We have another idea using everyone's hand prints and some finger paints, I guess I better start thinking mess-free thoughts now!!  I hope you have fun making a Hand/Footprint Turkey with your toddler! 

-Kristi

Sunday, November 13, 2011

Pumpkin-Pecan Muffins

This morning I woke up with the need to make a batch of muffins.  Since I had just made blueberry muffins and I had a container of my own home-grown, home-canned pureed pumpkin in the fridge, I decided that today was just the right sort of day for something Fall-ish.  So, I made pumpkin muffins.  And because I had some extra pecans in the freezer, I added a handful of those too.  Not only were they super soft, moist and delicious, but they also made the house smell wonderful!  I hope you give them a try and that your family likes them as much as mine did.

-Enjoy!
Kristi

PS Did I mention that this is my own recipe?


Pumpkin Pecan Muffins
Makes 1 1/2 dozen

Ingredients
  • 1 cup sugar
  • 1/2 cup packed brown sugar
  • 1/2 cup vegetable oil
  • 3 eggs
  • 1 teaspoon vanilla
  • 1/2 cup water
  • 1 1/2 cups canned pumpkin (if using fresh pumpkin, omit water)
  • 3 cups all-purpose flour
  • 1 1/2 teaspoons baking powder
  • 1 teaspoon baking soda
  • 1 teaspoon ground cloves
  • 1 1/2 teaspoons ground cinnamon
  • 1 teaspoon ground nutmeg
  • 1 teaspoon salt
  • 1 1/2 cups chopped pecans, divided

           Directions

  1. In a large mixing bowl, beat sugar,  brown sugar, oil, eggs, pumpkin and water, if using abd vanilla. 
  2. Combine flour, baking powder, soda, spices and salt in a seperate bowl. Add to pumpkin mixture; blend well. Stir in 1 cup chopped pecans. 
  3. Spoon into greased muffin tins, filling 3/4 full. Sprinkle with remaining pecans.
     4. Bake for 15-20 minutes at 400*.

Friday, November 04, 2011

Faith, Belief and Friendship

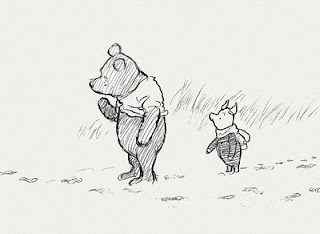
Pooh and Piglet walked home thoughtfully together in the golden evening, and for a long time they were silent.
"When you wake up in the morning, Pooh," said Piglet at last, "what's the first thing you say to yourself?"
"What's for breakfast?" said Pooh. "What do you say, Piglet?"
"I say, I wonder what's going to happen exciting today?" said Piglet.
Pooh nodded thoughtfully.

"It's the same thing," he said.
-Winnie the Pooh


For my friend Dee, who has given me my dreams, my "Something Exciting" on a silver platter and given me so much to be thankful for this year.  If it weren't for your belief and enthusiasm, I wouldn't be madly churning out sewing patterns for the fabric enthused masses.  I will always and forever be grateful for this hugely incredible opportunity!

xoxoxo
-Kristi