Wednesday, September 24, 2014

Meet the Quilter: Quilt Story Meg!

Every once in awhile I like to feature one of my favorite quilters. Tonight, I have an interview and eye candy from someone I have long admired. Megan of Quilt Story Meg. She is one of the most talented, inspiring sewists in our community. Every single picture on her Instagram feed is beautiful, her quilts are gorgeous, her garments are flawless and what about the lady herself? She's all that and more. She's a full package deal. I wanted you to get to know her a little better so I asked her a few questions. She was kind enough to answer them and send along an introduction. 

Enjoy!

**************************************************

I'm Megan, I'm a stay-at-home mom of three, 2 sons and a daughter.  Last year we moved across country to Northern Virginia while my husband completes his Family Medicine Residency in Washington DC.  I write a blog with my sister Heather (www.QuiltStory.blogspot.com) and we write patterns by the same name, Quilt Story. On our blog we feature other quilters finished quilts, our own projects & tutorials and a linky party every Tuesday!


1. How long have you been sewing?
-I sewed my first project at about 8 (a quillow!) and sewed various things throughout high school, a quilt for a school project, decor for my room, PJ pants.  I learned how to quilt at 24 before I had my first son.  I guess I've been at it most my life, my poor math skills calculate that at 23 years!


2. Who taught you?
-I grew-up with my mom making all my clothes and I loved it!  She taught me how to sew and my aunt (her sister) taught me how to quilt.

3. What is the coolest sewing project that you've been a part of?
-I'm happy to have been asked to collaborate in a couple of books and another coming out Spring 2015.  Modern Quilts from the Blogging Universe and Sweet Celebrations.  But the project that has meant so much to me was helping to create 10 memory quilts a little more than a year ago.  My oldest sister Amy's husband passed away suddenly in the Fall 2012.  They had 10 children together.  My mom, sister (Heather), my aunt and I all collaborated together to make them for the kids.  He was a school teacher and we had a lot of dress shirts to work with.  It's been such a hard and sad situation, being able to create something meaningful is healing for everyone.


4. What is your proudest sewing accomplishment?
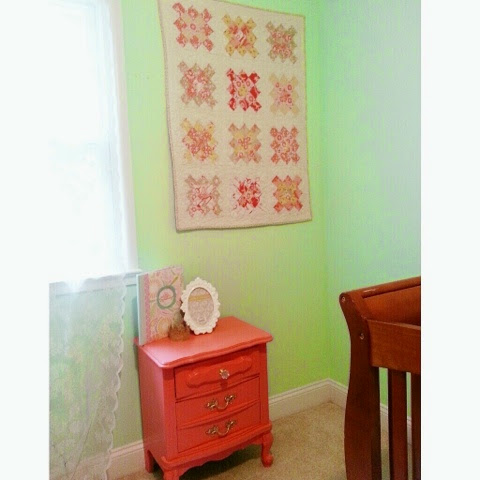
-Currently I've been decorating my daughter's room...and I think for me creating things for my home and people I love is my favorite.  Plus I get to see it all the time and impress myself that I made it, lol! When I had my daughter I jumped right into sewing clothing.  Actually the night I found out I was having a girl I had cut out two dresses! :)  This spring I made her a dress from a real pattern with no help from my mom (okay I called her).  I was pretty proud! 


5. Who are your sewing/quilting heroes and why?
-Hmmm when I first started blogging and found the online community I was very drawn to Crazy Mom Quilts, Oh Frannson and Cluck Cluck Sew.  Since then...there are too many to name!!! :)

6. What's on your sewing bucket list?
-The list is so long!!  I'd love to create a couple of larger duffle type bags for myself, a paper pieced quilt (I've just done blocks), Sew-Together Bag, EPP hexies, challenge myself with children's clothing, and more!! :) 


7. What is your current project?
-My dad passed away last December from a very very short illness.  It has been the hardest thing I've ever faced in my life.  When I finally returned home from my parent's home after 6 weeks I didn't to do anything.  I wanted to lay in my bed all day but with three little kids that wasn't a choice.  Instead I jumped into creative projects...it was the only thing I felt I could do.  One of the projects I'm doing is creating a Union Jack quilt made with my dad's shirts and other fabrics.  My dad is from England and it holds a very special place in my heart. 


8. Favorite sewing tip that you want to pass along?
-These aren't groundbreaking...but through my years I've learned the value in measuring twice before cutting :)  Also pin a lot.  Learn your own machine. For example I was having so many tension problems with my machine and ultimately discovered that a popular brand just doesn't work for me!  As soon as I switched it's been smooth sailing!  Lastly there is a lot of importance in pressing!  A strong hot iron (doesn't have to be expensive!) and starch.  I'm a fan of starching my fabrics for quilting.  It allows them to keep their shape without stretching.  Boom.  :)

9. Who is your favorite fabric designer?
Favorites include Sarah Jane, Heather Ross, Joel Dewberry, Kate Spain, Violet Craft, Heather Bailey, Tasha Noel, Leciens, Melody Miller and lots more!!


10. If you could go on a sewing retreat anywhere to learn from and with anyone where would it be, who would teach and who would be there to learn with you?
Ahh!!! I'm just game for being able to attend a retreat and I'd have to have my sister Heather there!!! :)

11. What is something about you and your hobby that most people don't know?
Well sadly I think there are too many people, especially those who know me from Instagram, who don't know we sell quilt patterns!! :)  


To find out more or to follow Megan, and her sister Heather of course, click the links or find her on Instagram.

Instagram @quiltstorymeg

Thank you so much, Megan! 

Monday, September 22, 2014

Tutorial: CatStar Block


You might remember that I hosted a mini quilt swap? Yeah? Well, this CatStar Block was from that swap. I saw it under the hashtag and had to compliment it's maker, Janda, on how cute it was. She made it up out of her own brilliant head! Isn't she clever? There were a lot of requests for a tutorial on it but since she doesn't have a blog, she had to say no. So, I offered to help out.


I've decided to host a little #halloweencatstar quilt-a-long. Are you interested? One lucky participant will receive a Halloween trick-or-treat bag, stuffed full of goodies,from me! You must complete your Halloween CatStar block in order to be entered in the drawing, though. Let's get going, shall we?

You will need four colors of fabrics, in three shades each, and two different background fabrics for a total of fourteen fabrics. Fat quarters and charm squares work great. 


Using my photo above as a guide for color/fabric reference, cut the following:

Chevron (large polka dot) 
-four 4" squares

Background (small polka dot)
-fourteen 4" squares
-four 1 3/4" squares

Cat A right ear
-one 4" square

Cat A left ear
-one 4" square

Cat A face/forehead
-two 3 1/2" squares
-two 1 3/4" squares

Cat B right ear
-one 4" square

Cat B left ear
-one 4" square

Cat B face/forehead
-two 3 1/2" squares
-two 1 3/4" squares

Cat C right ear
-one 4" square

Cat C left ear
-one 4" square

Cat C face/forehead
-two 3 1/2" squares
-two 1 3/4" squares


Cat D right ear
-one 4" square

Cat D left ear
-one 4" square

Cat D face/forehead
-two 3 1/2" squares
-two 1 3/4" squares


{it helps to label everything}
{don't pay too much attention, I switched things around a bit after I took this pic}

Begin by making the center of the CatStar Block. Get your 3 1/2" face/forehead squares for the center cats and the four 1 3/4" squares. Place the small square in one corner of the large square, right sides together. With a fabric marking both, draw a line from corner to corner.

Stitch on this line,


Trim seam to 1/4".

Flip the corner fabric back and press.

Do this for all four inner star cat pieces.

For the outer star cat pieces, you will repeat the above process using the remaining four 3 1/2" face/forehead pieces and the four 1 3/4" coordinating pieces. 

You will also need to repeat this process for the four 4" background corner pieces and the four 1 3/4" outer star cat for heads.

I feel like I'm speaking gibberish so here's a pic of what the layout will look like:

To make the ears, you'll need to make half square triangles. With right sides together, match up one ear with one background square. You'll be doing all the ears at this time, so go ahead and match them all. Draw a line from corner to corner, right down the middle of each ear, then 1/4" away on each side. The first line (the one that is now on the middle) will become your cutting line. The other two are stitching lines.

Stitch directly on the line, adding a new square pair (teehee) after the last of the line is sewn & without cutting your thread or picking up the presser foot. This is chain stitching.

When you've reached the end of the ear chain, turn it around and stitch the lines on the other side. Snip the threads to separate, then use your rotary cutter and acrylic ruler to cut them in half.

Carefully press the half square triangles open, making sure the seam is towards the darker side.

Your Cat Star should look like this, after laying out the ear pieces:

Repeat the Half Square Triangle chain for the chevron pieces:

Now it's time to put it all together. Stitch four squares together, forming one block.
{this is where I messed up my inner star cats. I didn't notice so, my end result looks like calico cats. Oh well, it works.}

Now, stitch the blocks into rows.

And finally, stitch the rows together to finish your Halloween CatStar Block.

If you want to participate in the #halloweencatstar quilt-a-long, please be sure to use the hashtag and tag me (@schnitzelandboo) and Janda (@jrm0501) on Instagram. Don't forget, there's a sweet prize for one of our participants!

If you love this block, leave a comment and stop by Janda's Instagram feed and tell her. 

Happy Quilting!
-Kristi

PS thank you IG @actsofcraftiness for catching my lack of info mistake!

*finished size of CatStar is 18"
*please use Halloween inspired colors and/or fabrics to count for the drawing (but also know that Halloween is not limited to black and orange!)
*deadline to enter your Halloween CatStar is October 28, 2014 because that's my birthday.

{the original CatStar Block 
by Janda Wilden}


Sunday, September 21, 2014

Tutorial: Simple Appliquéd Dish Towel

Seems I'm a bit behind (again!) so here I am; I just sat down after sewing a new doll for Roo:

{Percy! Pattern coming to Rebel Craft Media soon, yay!}

I have some "spare time" (AHAHAHAHAAAAAA who am I kidding?) so I'm giving you the last installment of The Dish Towel Series. This time it's for a really easy mixing bowl appliquéd towel with no printable template required. You get to make your own!

Start off with a clean, dry, freshly pressed towel. Here we go:


 Choose three fabrics that coordinate, press them and set aside with the towel.

You will need three pieces of computer paper, a grid ruler, pencil, Pellon Wonder Under (a paper backed fusible web), thread and the usual iron/ironing board/sewing machine.

To make the appliqué, fold the 11" side of paper in half so they're 8 1/2"x5 1/2". 

Using the photo above as a guide, draw the bowls. For example, for the largest bowl, measure 5" across the top, 5" down at the fold and 3 1/2" across the bottom of the page. From that point, measure up 3/8" and draw a line. Draw a 3/8" line down from the top of the bowl, 1/4" in and then blend towards the bottom. 

Cut the bowl patterns out.
{it's already cute and it's only paper!}

To attach Wonder-Under:
1-place the wrong side of the fabric against the rough side of Wonder-Under. Using a hot dry iron, press the fabric for 5-8 seconds. Allow to cool, then trace one of the bowls onto the paper, then cut. Peel off the paper backing and stick appliqué into place:

Starting about 2 1/2" up from bottom of towel, arrange the bowls to your liking:

Press into place.

Edgestitch each bowl using a coordinating thread.

I like to go over the stitching line a few times for durability and to make the rough-edge appliqué look more purposeful.

And that's it! One final press and you're done! 

Happy Sewing!
Kristi


Monday, September 15, 2014

Tutorial: Triple Ruffled Dish Towel


A few days ago, I showed you an easy way to trim a dish towel, making it gift-worthy. Tonight, I'm going to explain how to make this (equally simple) Triple Ruffled Dish Towel.

I was supposed to post this the day after the first tutorial, but I have been under the wire trying to get the instructions finished for my first Rebel Craft Media published pattern, The Betsy Travel Bag. My fingers are still buzzing from the two-fingered typing of that project (I closed the lid on the laptop and immediately picked up my phone and opened the Blogger app!) but I didn't want to delay any further. 

So, then...here we go!

{Clementine by Blend Fabrics}

You will need:
-two 3"xWOF (width of fold) strips of three different fabrics for a total of six strips. 
-one dish towel of your choice (I prefer the flour sack towels, available at Target)
-thread
-grid ruler
-fabric marking pen

*please keep in mind that this tutorial and fabric strip measurements are based on the 30"x32" flour sack towel. You might have to adjust the length of your strips for a smaller towel.*


Draw three parallel lines at the bottom of the towel at every 2".


Start by stitching the ends of the strips together; press seams open.

Using a grid ruler, measure and mark 1" up from bottom edge down the length of the wrong side of each strip.


Fold raw edge to meet the line; press.

Edgestitch hems in place.

It's kinda neat looking all piled up:

Now, change your stitch length to the longest one your machine has. From
The right side of the fabric, stitch a line 1/4" away from top edge.


Leave the thread tails long on both ends. You will need these to gather the fabric!


Pin the center of the bottom strip to the center of the bottom line on the towel. Pin the ends of the strip to the sides of the towel.


Very carefully pull the bobbin threads to gather along the stitching line. You're going to ruffle one half at a time. Adjust the fullness by sliding and bunching along the thread. Once your ruffle is the same length as the half if towel that you're working on, pin it in place. Now you can start ruffling the other half.


Top stitch along the gathering line. Repeat for middle and top ruffles.


Voila! A pretty cute dish towel! They'll think you got it at Anthropologie.


Happy Sewing!
-Kristi-