**warning: this is a long and picture heavy post!**
My little girl is
super picky about clothes. She won't wear jeans; they make her cry:
{but seriously, how adorable is she in them??}
She won't wear nightgowns or pj pants or things with ruffles to bed. (We now have a drawer of designated sleep t-shirts .) She loves leggings, skirts, dresses, tights, and cardigan sweaters.
She does NOT like shorts. Not even a little bit. There's been one pair that I've been able to convince her to wear. ONE. The strange thing is, they're denim. I don't get it. So, I thought why lose a good thing? Better copy them and make a few more pairs! We live in "Hotlanta" she's probably going to start liking shorts sooner than later!
{fun at Grandma's house in The Shorts}
Today I'm going to show you how to copy your child's favorite shorts so you can make them again. It's pretty easy and straightforward with no crazy tools or rulers to use. Now go hunt down that pair they love and let's get started.
{true blue by Ana Davis for Blend Fabrics}
You will need:
Paper bag or two
Grid ruler
Pencil
Paper scissors
Favorite shorts
1/2 yard (or more) of two main fabrics
1/2 yard of two fabrics of two accent fabrics
1 yard 1" non-roll elastic
Thread
Cut the bottom off the paper bag, then cut down the back "seam"; lay it print side down on your work surface.
Turn the shorts inside out, then tuck one leg inside the other.
Carefully trace around the outside of the shorts, as close to the seam edge as possible. You'll need to flatten/open out the seam for accuracy. Use a grid ruler to draw the hem line.
{I skipped this pocket style for this pattern}
Draw the grainline (usually it's perpindicular to the hemline) and label the pattern piece with front/back, size, name etc.
Repeat this process for the remaining half, whether that's the front or back. After you've traced both pieces, you can go back and clean up the lines as necessary. Add 1" to the top of both front and back pieces, along the waist.
I created a back yoke by measuring 1 1/2" down from ORIGINAL waist line on the side seam and 2 1/2" down on the center back seam; draw a dashed line. Measure down from the dashed line 1/2" and draw a solid line. The solid line indicates the seam line, the dashed line is the yoke cutting line. Cut the entire back piece from the paper. Retrace the yoke onto the paper, add 1/2" to bottom; cut new piece out and discard the original yoke.
{be sure to label all pattern pieces!}
Regardless of the type of waistband the pair you are copying has, you can add an elastic waistband to the drafted pair. This is the easiest option. To create the waistband pattern pieces, measure across the top of the pattern shorts front and back. Multiply the measurements by two and you have the length.
It says to make it 3.5" wide, but I think I would increase that to 4" because it was a struggle getting the elastic in!
To make the front pockets, have your child place their hand, fingers not splayed, on an empty space on your bag; trace around their hand.
Draw a straight line across the wrists. Measure around the hand (using the widest part of the hand and longest finger as your measuring point) about 1" on all four sides. This will give their fingers enough wiggle room. Use your grid ruler to add 1/4" around all four sides. Cut around this rectangle; fold in half lengthwise. Use a cup, lid or just freehand to draw a curved line on the corners of the pocket bottom.
Cut all pattern pieces out, if you haven't already done so.
{front, back, pocket, yoke, waistband notes}
You've just drafted a pattern! Well done! Ok, now we need to sew it up. It's probably a good idea to test these out on some inexpensive fabric or muslin first, unless you're feeling comfortable and confident.
You will need to cut the following:
4 front (2 main, 2 reverse)
4 back (2 main, 2 reverse)
8 pockets (4 accent, 4 main/reverse)
2 yoke (1 main, 1reverse)
1 waistband front (main only)
1 waistband back (main only)
Seam allowance is 1/2" unless otherwise noted.
Cut pattern pieces from fabric.
{if your fabric is directional, place the pocket piece upside down-not pattern piece wrong side down-on the fabric}
Align the back yoke pieces with the coordinating backs.
Place the yokes face down on the shorts back, matching raw edges; stitch.
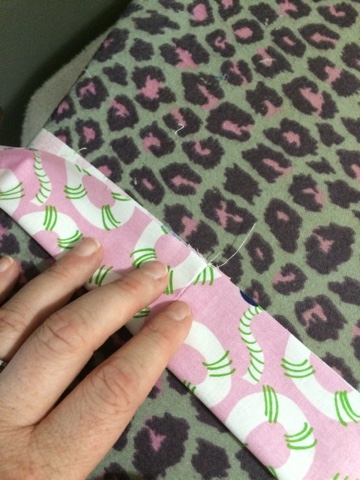
Press seam towards hem; topstitch about 1/4" from seam line.
Place back pieces right sides together, matching curves and raw edges; stitch the crotch seam.
Clip curves; press seam to one side as best you can. Set shorts back aside.
For the pockets:
With right sides together, place one main/reverse and one accent together . Stitch on all four sides, leaving an opening to turn at top of pocket. Be sure to backstitch on both sides of the opening!
If you have pinking shears, trim the curved seam allowance with them. If not, simply notch the curves with your fabric scissors.
Trim corners; turn and press. Measure and draw a line 3" down on accent side of pocket.
Fold top of pocket to this line; press.
Edgestitch pocket about 1/8".
Place pocket, lining side down, on shorts front. You will need to hold these up to your child to see where best to place them, or if a child is not available (or willing) you can center them, using the hem width as a guide. Edgestitch pocket to shorts front, making sure to backstitch. Do not sew the pocket shut!
*Note the placement for the other side.
With right sides together, stitch crotch seam of shorts front.
Clip curves; press seam to side.
With right sides together, stitch shorts side and inseams.
Repeat the above for reverse side of shorts.
For the waistband:
Lay the waistband front wrong side up. On one side, measure 1/2" up from bottom edge; mark. Measure 1" up from mark and make another mark. Stitch waistband front and back sides together, leaving space between marks empty. Be sure to backstitch here!
Fold waistband in half lengthwise; press.
Find the center front and back of waist band by matching side seams and folding in half; press.
Match side and center seams of waistband to side and center seams of shorts; pin in place; stitch.
**Make sure elastic opening is face out.**
Press waistband seam towards bottom of shorts.
Top stitch the top edge of waistband 1/4" from top edge.
Fold top of reverse shorts down 3/8"; press. Fold hemline of shorts 1/2" under; press; unfold. Turn shorts main inside out. (Leave reverse shorts wrong side out.) Insert main into reverse, right sides together.
Stitch one leg's hemline only. The other leg will be left for turningshorts right side out. Carefully pin folded edge of shorts top over the waistband seam line; stitch in the ditch. I apologize, I didn't get a photo of this step. But, here is a handy link explaining stitch in the ditch.
Turn shorts out through the unstitched leg. Refold the hemline to the inside of the shorts; pin in place. Topstitch both legs 1/8" from bottom edge.
Measure elastic around childs waist, cut to exact measurement. Insert elastic through the opening you created in the waistband. Overlap the ends by 1"; stitch together using a zigzag (preferable) or straight stitch. Adjust gathers, slip stitch waistband opening closed.
Voilà! You just copied your child's favorite shorts! Way to go!