 | ||
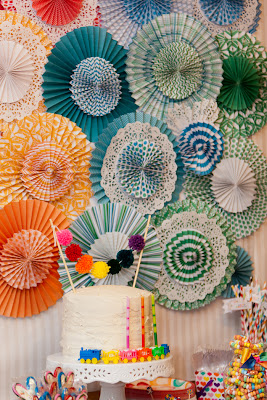
| Paper Medallion backdrop from Roo's 3rd birthday party. |
A very sweet Instagram friend of mine (who lives in Hong Kong) asked me about a button that one of her small friends was wearing. She wanted to make one, but wasn't sure how to go about it. She guessed that I could probably help her, and she was right. I had a quilt to finish and a new pattern to finalize first, now that those things are done, I am finally ready to share the how-to with all of you.
Gather all of your supplies. You will need three sheets of paper for the medallion, a scrap of contrast paper for the center, a scrap pf paper for the back and a scrap piece of felt. You will also need 1"and 1/8" ribbon, a safety pin, double sided tape, hot glue and glue sticks, ruler, scissors and a pencil. (Optional: sequins, buttons, glitter etc.)
Start by measuring and marking all three of your paper to the same size. For this example, my paper was about 6" square.
Trim to size.
Start by folding your paper in half, this will give you a guideline to use as you fold. Open the paper up again, fold the edge into the center, then the edge to the outer fold. You will start to see the accordian effect.
In order to make sure the paper medallion doesn't stand too thick off of the wall or as a button, fold the length of your paper again, decreasing the width by half (boy, I hope that makes sense!)
Now, fold the accordian in half, matching short ends and creasing at the center.
Repeat for remaining two pieces of paper.
Place a piece of double-sided tape along the length of the folded paper.
Firmly press two paper pieces together.
Tape the two center folded sides and press firmly to itself; tape the long edge and attach the remaining folded piece of paper (with the center fold already taped to itself.)
You should have something like this.
Now, find a glass or a compass to judge the circle size for the top of the medallion. I used a pilsner glass and found it was just the right size.
Trace and cut out two circles.
Cut several 4" pieces of 1" and 1/8" ribbon (in this case, I used 10 of each)
Using your hot glue gun, place a bead of glue on the underside of one of your paper circles, about 3/4" inside the edge and press ONE edge of your UNFOLDED ribbon to the glue.
Work your way all the way around the circle.
Run a strip of hot glue across three or four ribbon edges at a time, fold ribbon in half to meet raw edges and cover the glue.
Fold your 1/8" ribbon in half, having the edges slightly crossed; place a bead of glue between the 1" ribbon folds and press the 1/8" ribbon to the glue. You might want to use a toothpick to avoid burning your fingers.
When you are finished, you should have something like this:
Squeeze out a large blob of hot glue in the center of all those raw edges of ribbon, flip the circle over and place in the center of the accordian circle.
Add a good size dollop of glue to the underside of the second paper circle, flip it over and center it on the back side of the medallion.
Cut three 8" lengths of 1" ribbon, glue one piece to the middle/center of the back circle.
Place a bead of glue on top of the ribbon, arrange second piece of ribbon directly on top of the first, but angled to one side; repeat for last piece of ribbon.
*Optional-cut four 6" lengths of 1/8" ribbon and arrange on the outside and between 1" ribbon pieces, cover edges with a scrap of 1" ribbon and hot glue.
Cut two slits in the felt scrap for the safety pin, squeeze a light line of glue on either side of the slits and apply to the back of the medallion. Make sure the felt is not flat against the medallion, but instead has a "bubble" or gap in the center.
Trim edges of ribbon in an inverted "V".
Decorate with sequins, buttons, glitter, a photo etc. You're all done!
Thank you for following along!
Happy Crafting!
-Kristi


