Showing posts with label Anna Griffin. Show all posts

Monday, September 15, 2014

Tutorial: Triple Ruffled Dish Towel


A few days ago, I showed you an easy way to trim a dish towel, making it gift-worthy. Tonight, I'm going to explain how to make this (equally simple) Triple Ruffled Dish Towel.

I was supposed to post this the day after the first tutorial, but I have been under the wire trying to get the instructions finished for my first Rebel Craft Media published pattern, The Betsy Travel Bag. My fingers are still buzzing from the two-fingered typing of that project (I closed the lid on the laptop and immediately picked up my phone and opened the Blogger app!) but I didn't want to delay any further. 

So, then...here we go!

{Clementine by Blend Fabrics}

You will need:
-two 3"xWOF (width of fold) strips of three different fabrics for a total of six strips. 
-one dish towel of your choice (I prefer the flour sack towels, available at Target)
-thread
-grid ruler
-fabric marking pen

*please keep in mind that this tutorial and fabric strip measurements are based on the 30"x32" flour sack towel. You might have to adjust the length of your strips for a smaller towel.*


Draw three parallel lines at the bottom of the towel at every 2".


Start by stitching the ends of the strips together; press seams open.

Using a grid ruler, measure and mark 1" up from bottom edge down the length of the wrong side of each strip.


Fold raw edge to meet the line; press.

Edgestitch hems in place.

It's kinda neat looking all piled up:

Now, change your stitch length to the longest one your machine has. From
The right side of the fabric, stitch a line 1/4" away from top edge.


Leave the thread tails long on both ends. You will need these to gather the fabric!


Pin the center of the bottom strip to the center of the bottom line on the towel. Pin the ends of the strip to the sides of the towel.


Very carefully pull the bobbin threads to gather along the stitching line. You're going to ruffle one half at a time. Adjust the fullness by sliding and bunching along the thread. Once your ruffle is the same length as the half if towel that you're working on, pin it in place. Now you can start ruffling the other half.


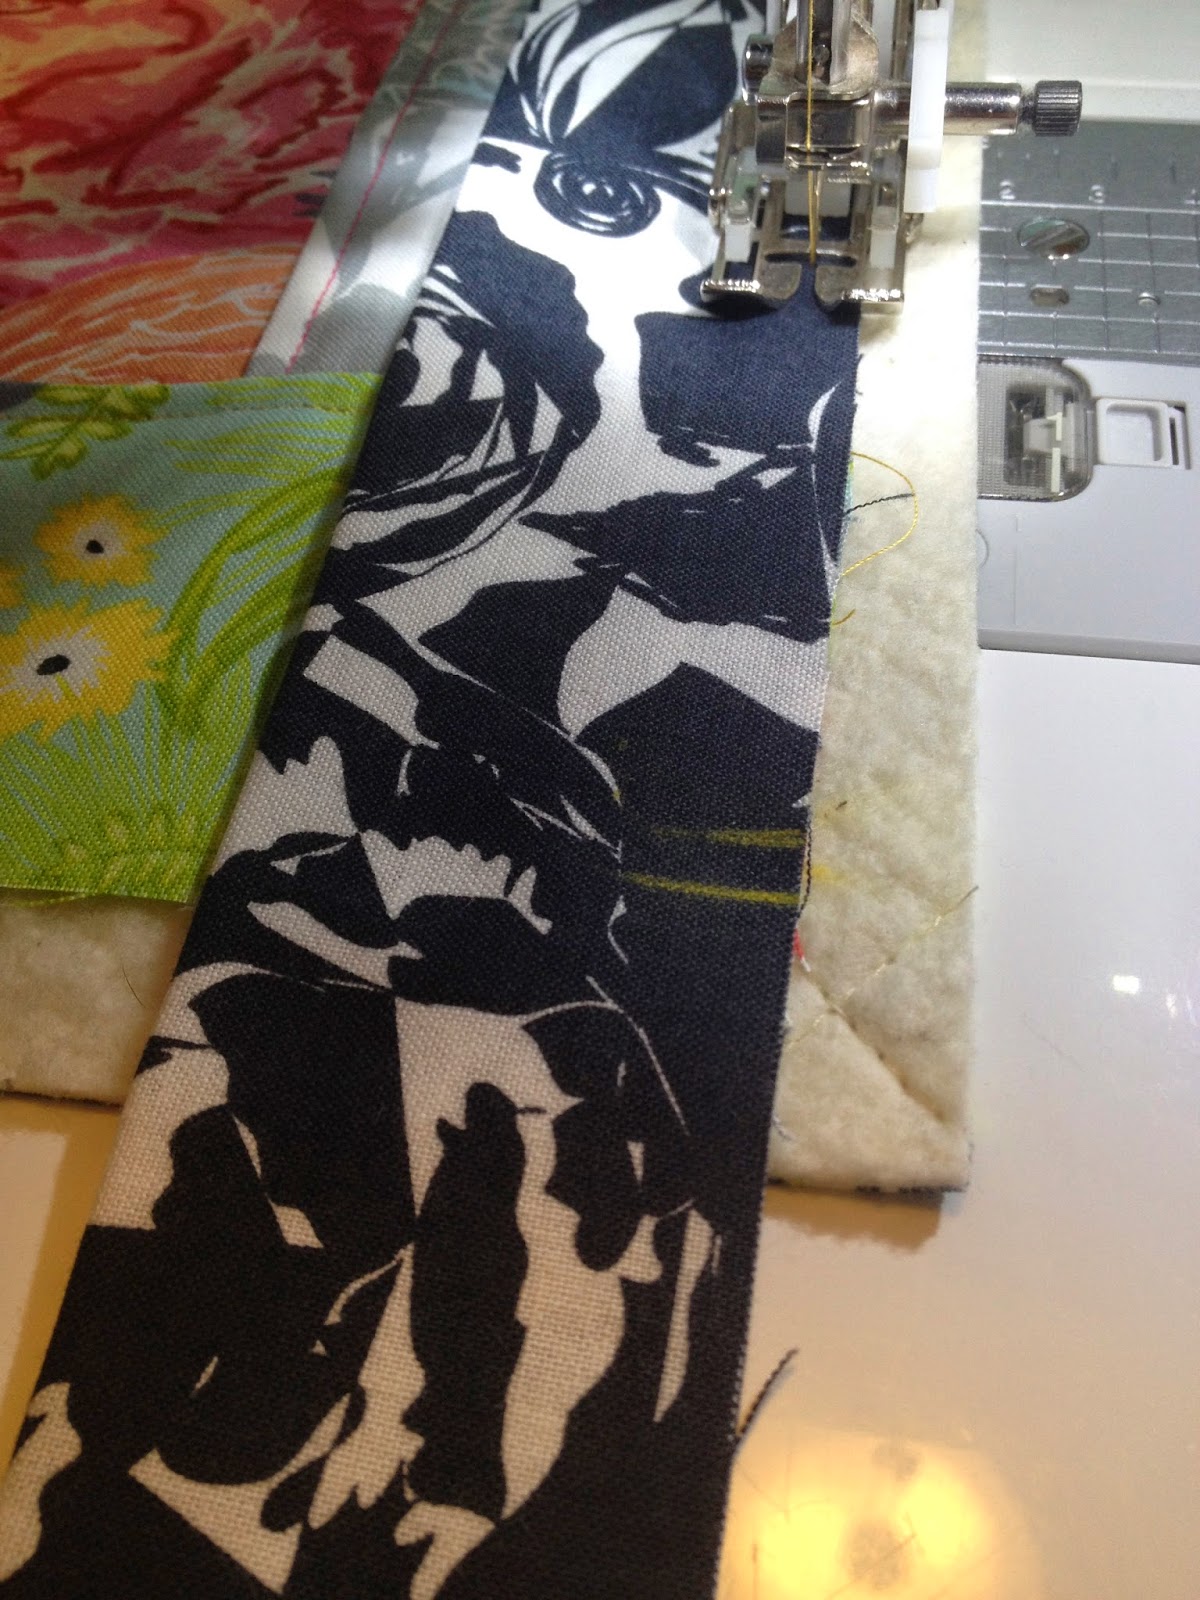
Top stitch along the gathering line. Repeat for middle and top ruffles.


Voila! A pretty cute dish towel! They'll think you got it at Anthropologie.


Happy Sewing!
-Kristi-


Thursday, May 29, 2014

Tutorial: Modern Subway Tile Quilt


Here's the thing about me and quilting.  I don't really know the official names of blocks (aside from Churn Dash, Log Cabin and Virginia Star) and I don't ever follow a pattern. I'll figure out the names eventually, but I'll probably never follow a pattern because I just really enjoy sitting down with pencil in hand and a fresh sheet of graph paper.  Call me a glutton for punishment, I mean I'm terrible at math.  Absolutely hopeless.  I have no business attempting it without a calculator.  Terrible.

Yet, somehow I've been successful with every attempt, so that's good.  

Today, I'm bringing you a tutorial for a quilt that I've decided to call "Modern Subway Tiles" because to me that's exactly what it looks like. 

Blend Fabrics sent "Maisie" by Maude Asbury to me and I couldn't wait to make something with it.  At first I thought I'd make a shower curtain, but then after I started putting it together, my little girl asked if it was going to be a quilt for her.  How could I resist?


For this quilt top, you will need 13 different fabrics, approximately 1/2 yard of each.
 You will be creating rows with 9 tiles, so will need to keep track of the fabrics you are using for a successful pattern repeat of 18 rows.  Arrange your fabric however you like, 
but then label them #'s 1-13.


Cut three 8 1/2"x WOF strips from each fabric.

Follow the chart below to cut 4 1/2"x 8 1/2" Full Tiles (F)
or 4 3/4"x 4 1/2" Half Tiles (H) of the following:
(F= 4 1/2"X8 1/2" H= 4 3/4"X 4 1/2")
Fabric 1: 13/F     1/H
Fabric 2: 12/F     2/H
Fabric 3: 11/F     2/H
Fabric 4: 12/F     1/H
Fabric 5: 12/F   1/H  
Fabric 6: 11/F     2/H
Fabric 7: 12/F     1/H
Fabric 8: 12/F     1/H
Fabric 9: 11/F     2/H
Fabric 10: 11/F   2/H
Fabric 11: 12/F   1/H
Fabric 12: 12/F   1/H
Fabric 13: 12/F   1/H

tiles laid in coordination to keep organized. full tiles below, half tiles above

Now, I hope this doesn't get confusing.  If you labeled everything, it should be fairly easy to follow.  Since I am not very good with computers, I have no idea how to make a grid for you to follow.  
So, instead, I am going to break it down for you row by row.  Ready?  Here we go:

**Remember, "H" means "Half Tile".  Assume all tiles are full if there is no "H"**

Row One
1, 2, 3, 4, 5, 6, 7, 8, 9
Row Two
10H, 11, 12, 13, 1, 2, 3, 4, 5, 6H
Row Three
7, 8, 9, 10, 11, 12, 13, 1, 2
Row Four
3H, 4, 5, 6, 7, 8, 9, 10, 11, 12H
Row Five
13, 1, 2, 3, 4, 5, 6, 7, 8
Row Six
9H, 10, 11, 12, 13, 1, 2, 3, 4, 5H
Row Seven
 6, 7, 8, 9, 10, 11, 12, 13, 1
Row Eight
2H, 3, 4, 5, 6, 7, 8, 9, 10, 11H
Row Nine
12, 13, 1, 2, 3, 4, 5, 6, 7
Row Ten
8H, 9, 10, 11, 12, 13, 1, 2, 3, 4H
Row Eleven
5, 6, 7, 8, 9, 10, 11, 12, 13
Row Twelve
1H, 2, 3, 4, 5, 6, 7, 8, 9, 10H
Row Thirteen
11, 12, 13, 1, 2, 3, 4, 5, 6
Row Fourteen
7H, 8, 9, 10, 11, 12, 13, 1, 2, 3H
Row Fifteen
4, 5, 6, 7, 8, 9, 10, 11, 12
Row Sixteen
13H, 1, 2, 3, 4, 5, 6, 7, 8, 9H
Row Seventeen
10, 11, 12, 13, 1, 2, 3, 4, 5
Row Eighteen
6H, 7, 8, 9, 10, 11, 12, 13, 1, 2

Stitch each tile into rows, then label the row (1-18) on the left side when you are finished.


As you finish rows, lay them out on your design wall (or design floor, as the case may be) in numerical order.

 Of course, you'll want to watch out for any "helpers" that may be sewing with you...
(thank goodness you numbered those rows, huh?)

Stitch rows together, one by one.  Before you know it, you'll be finished!  And then you'll be running around trying to capture the ever-elusive perfect shot of your new quilt top!

attempt for the perfect shot, number one.  someone said it looked like it had nipples. oy.
attempt number two.  hey bushes! down in front, geez!
attempt number three.  good enough, i guess.

I hope that wasn't awfully confusing.  Remember, add your projects to the schnitzel & boo Flickr group when you finish them!  I'd love to see what you make from my tutorials.

Happy Quilting!
-Kristi-


Wednesday, May 07, 2014

Tutorial: Chalkboard Mini Quilt

It's no secret that I LOVE mini quilts, is it?  My collection is growing, my walls are shrinking and my heart is happier.  When I look around the walls of my sewing room, I see my friends.  I think that's what I love the most about mini quilts.  They're fast, fun and so darn satisfying to make.  I mean hey-you can say you completed an entire quilt in a day!


My second project as a tutorialist for Anna Griffin is for a Chalkboard Mini Quilt.  I think it is super adorable, and I'm pretty sure you will too.  If you're not sure where to buy chalkcloth, check out Laminates and Fabric Shoppe, both on Etsy. 

For this tutorial, I used Modern Eclectic by Khristian Howell.  You can view the entire collection here.


You will need:
*One Fat Quarter of Chalkcloth cut down to 12 3/4"x15 3/4"
*Two squares each of seven different fabrics cut into 2 3/4" squares
(or fourteen 2 3/4" squares)
*One Fat Quarter of an accent fabric cut into two 2 3/4"x22" strips and an applique motif
*One Fat Quarter cut into Four 3 1/2" strips for non-continuous binding
1/2 yard of backing fabric
*scrap of Warm 'N Natural batting measuring approximately 25"x25"
*thread
*rotary cutter/mat/acrylic ruler

**seam allowance is 1/4" unless otherwise noted**


Let's do this:

If you'd like to add an applique to your chalkboard, find a motif in your accent fabric that you like and cut around it, leaving approximately 1/4" all the way around it.  My floral motif was on the corner of my fabric, so I decided to put it in the corner of the chalkboard, and trimmed my edges nice and square to fit.  Decide where you want your applique to be based on the size and location of your motif on the fabric.

Carefully pin the applique to the chalkcloth, you don't want pinholes to be seen on your finished project, so make sure the pins are on the inside edge of the applique.

Edge-stitch around the applique:

I like to go around a few times to give it a more decorative look.

Cut your fabrics into 2 3/4" squares, if you haven't already done so.

Arrange the squares into rows (keep in mind that they will be attached to the sides of the chalkboard).  Stack them into two rows, and stitch. Press your seams to the sides (or use whichever method you prefer.  I like the one described here where you press towards every other square/strip.)

With right sides together, lay one strip on one side of the chalkcloth
 and stitch; repeat for the other side/strip.

Trim off any excess chalkcloth, if there is any.
 
Finger press the seams out.  
(Chalkcloth cannot be ironed)

Doesn't that look nice so far?

With right sides together, stitch the 2 3/4" accent strip to the top edge of the chalkboard; 
repeat for second strip and bottom edge.

Trim excess fabric from top and bottom.


Finger press strips away, and top-stitch all the way around the edge of the chalkcloth.

Yay!  The top of your Chalkboard Mini Quilt is done!  Now let's work on getting it finished. 

Lay the wrong side of the finished quilt top on your scrap of batting, then lay this on the wrong side of the quilt backing, creating a "quilt sandwich".  Using your rotary cutter, cutting mat and acrylic ruler, cut the batting/backing 1/2" larger all the way around; set top aside but do not separate the batting and backing.

Quilt the backing and batting together.
Sometimes I like to draw a design on the fabric with a fabric pen, as seen here.
When the quilting is finished, replace the quilt top, wrong side down, on top of the batting making sure it is squared up with 1/2" batting on every side.

Fenway Frank decided to take a nap on the ironing board.  Hmmm...probably not the best place for a nap, eh, Frankie?

Now for the coolest binding method EVER
Non-continuous binding.  Say what?  Just take a look.  It's life changing.

Ready?  Here we go: 

Begin by ironing the length of the strips, wrong sides together.

Align raw edges of binding with raw edge of quilt top (you should see the 1/2" of extra batting sticking out) making sure you have an extra couple of inches hanging off the top edge.  Measure inside the quilt top 1/4" from each edge and make a mark on the binding.  
This will be your starting and stopping point.
ignore the first yellow mark, I made a mistake and measured 1/2"

Stitch the binding down, making sure to backstitch at both marks.

Flip the binding off to the side, creating a 45* angle.  Align the second binding strip with the edge of the quilt top, and binding tail; stitch in the same manner as before, making sure to stop and backstitch 1/4" from the edge of the quilt top.  


Again, flip the binding tail away from the quilt and repeat for remaining binding pieces.

Now for those perfect mitered corners.

Place your acrylic ruler on the binding and measure the distance between the fold and the seam line.
Mine was 1 1/2":

Divide that measurement in half (for me it was 3/4") and make a mark.  


From the mark, measure 3/4" straight up (towards the binding tails) and make another mark.  

Connect your second mark to each seam line:

Pin the bindings together on these marks.  Pull the binding away from the quilt and stitch directly on the lines, making sure to back stitch when starting and stopping.


Trim excess binding from stitched lines:

Turn corners out, using a chopstick or metal bodkin to poke corners out, tuck quilt corner in. Repeat for remaining corners.  When you're finished, press binding out, wrap around to the back of the quilt; press again.  Pin binding in place and stitch however you prefer.  I personally love hand stitching, but feel free to get it done whichever way makes you happiest!

You are finished!  Don't you love it?  Now go hang it up somewhere and start a grocery list or a daily happy note to your family.  Did I give you enough time to whip one up for Mother's Day?

Happy quilting!
-Kristi-