

Of two things about this party I was sure: one, I was going to make homemade gumdrops and two I wanted an awesome way to serve/display them. I mean, if I was going to go to all that trouble to make them, I might as well put them into something worthy of my time!
I've been seeing cake plates and dessert stands pop up all over Pinterest and figured that I could probably figure out a way to make one myself. So, with an idea in my head and my husband in tow, we set off for Target where we bought a melamine plate and matching bowl (about $5 for both). After that, we went to Home Depot to find a way to connect them. First we looked at wooden dowels but couldn't figure out a satisfactory way to get the bowl to sit up high on it. We decided on an 1/4" x 12" threaded rod ($1.59 in the plumbing section) and a packet of nuts. A trip to the craft store yielded a spool of ribbon (on sale for $1!) and four wooden drawer pulls ($0.70).
 |
| (we ended up not using the metal things on the left) |
When we got home, my husband got right to work on the project. First he peeled off the price stickers and placed them in the center of the dishes.

Next, he measured and marked the centers for both.

Using a 1/4" drill bit, he slowly and carefully drilled a hole through the plate and bowl. He left the stickers on for this process to help prevent chipping the dishes.

Once the holes were drilled, we could assemble the stand. But first, we had to glue the wooden drawer pulls to the bottom of the plate so we would know how much room to leave for the threaded rod at the bottom.


Next, he twisted one of the nuts on to the rod and set the plate down onto it.


Next, we decided how far down the rod to place the bowl.

Once we were satisfied with the placement of the plate and bowl, he dabbed a bit of hot glue to the base of the plate and bowl to make sure it would sit nice and sturdy.

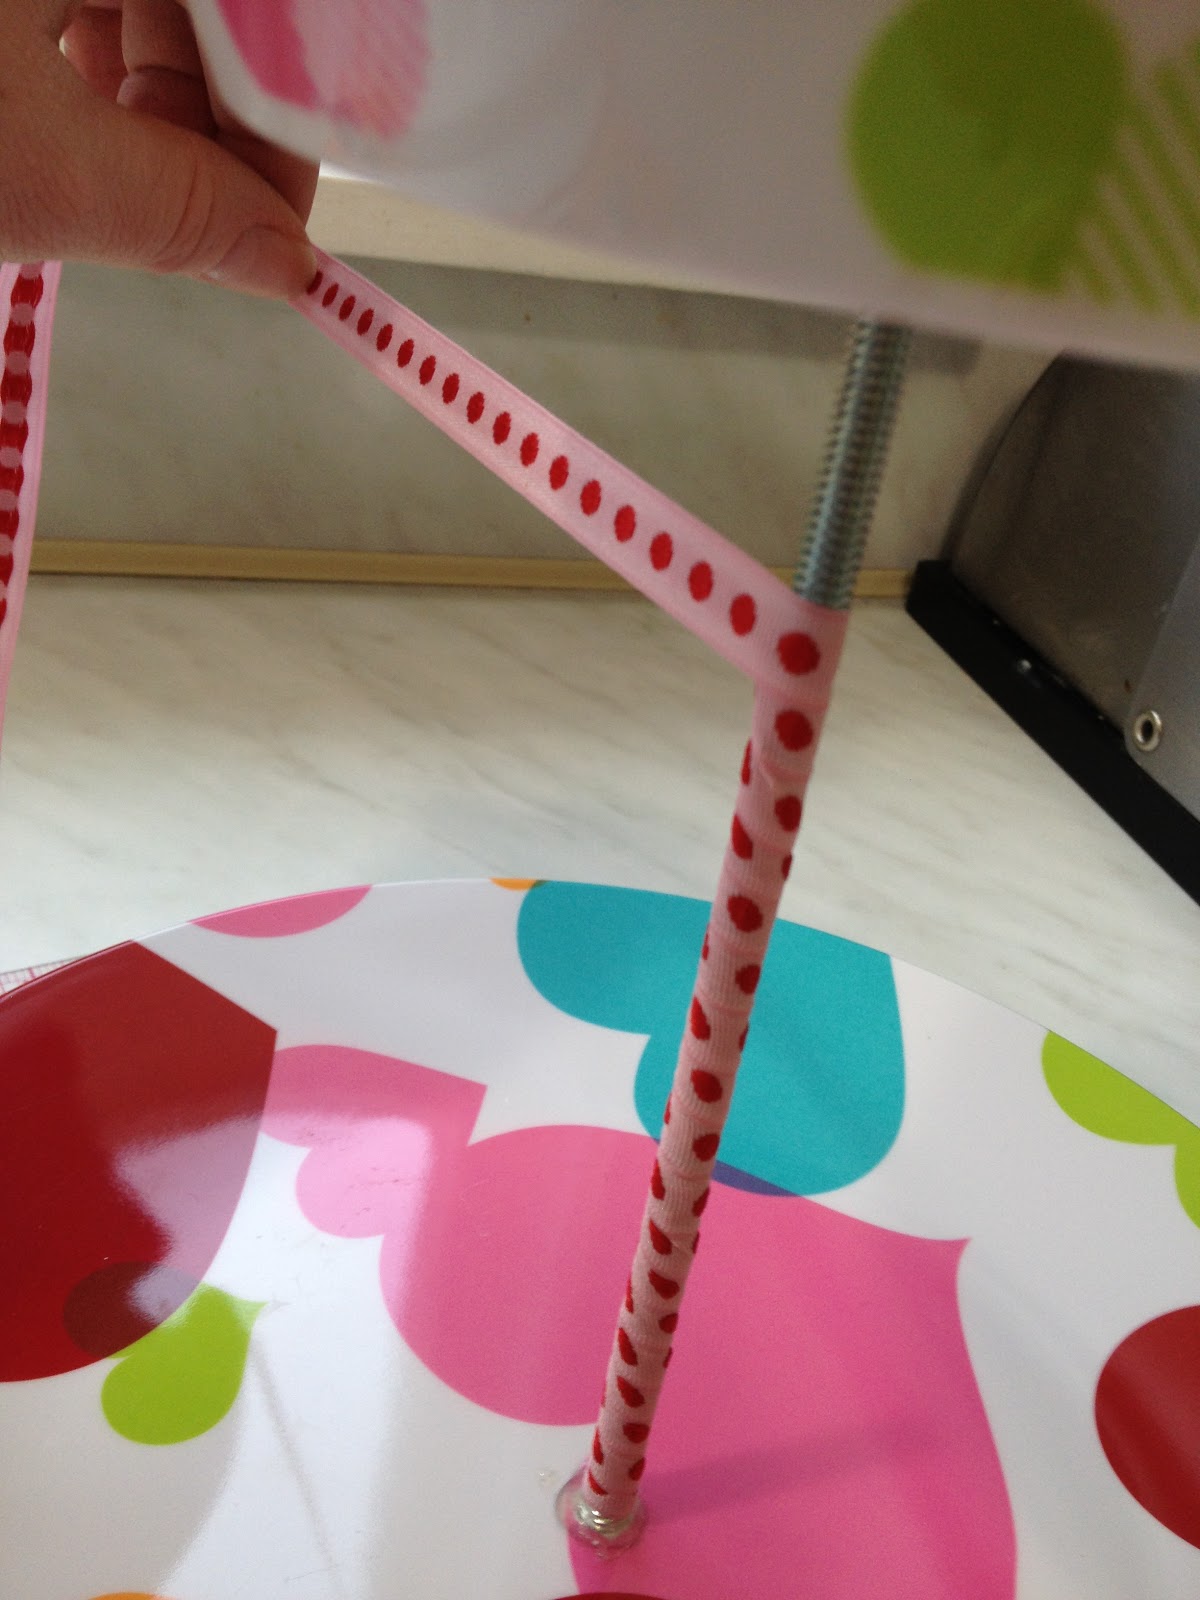
Then it was time to make the final touches. I used a piece of ribbon that I found in my stash to cover the rod. I applied about 2" of hot glue to the rod and wrapped the ribbon around it. Be sure to glue in small increments because it dries fast!
Looks good so far, right?

Oh, hello Ollie! We're almost done, then we can go for a walk!
For the very last touch, I put a dab of hot glue into the opening of a drawer pull and then threaded it on to the top of the rod. I decided to cover the knob in a piece of ribbon (instead of painting it) and top it off with a bow for extra cuteness.

I think it turned out really well, don't you? This was a very inexpensive and fun project to do. It only took us about an hour from start to finish and cost us around $10 to complete. It would be a fun decoration for any party or wedding and would be especially cool to make and give with your annual Christmas cookies.
 |
| This dessert stand is ready to boogie! |
Please feel free to leave me a comment, let me know if you have any questions!
-Kristi
When I am back to my crafty ways, meaning once the baby stuff is all organized I am going to try and do this. I can not believe how professional and cute this looks. Your tutorials are always so easy to read and understand. Love that you take pictures as well, makes the project even easier to comprehend!!!! Love it!
ReplyDeleteSuper clever! :)
ReplyDeleteVery cute!
ReplyDeleteLove it and will be making it very soon .... thankyou x
ReplyDelete