Showing posts with label Fabric. Show all posts

Tuesday, March 17, 2015

The Betsy Travel Bag Blog Hop

HOLY COW YOU GUYS GUESS WHAT???

TODAY IS THE DAY!


The long-awaited Betsy Travel Bag is finally here!  You can buy your presale copy TODAY!  I can't even begin to tell you how exciting this is for me.  This bag is about 8 or 9 months in the making and it really does feel like I'm having a baby!  What will all of your Betsy's look like?  How will people like the pattern?  What if no one likes it?  Will it get along with everyone's sewing abilities?  I'm so nervous and excited and downright giddy!

{the original Betsy Travel Bag, made by me for Elizabeth Dackson/Don't Call Me Betsy}


Do you remember how this bag came to be?  If not, click here for the full story (and here for the details not covered in the story).  Check out Elizabeth's post on her bag, the original bag, here.

Since that fateful day (hardy har), I have made three other BTB's and have at least five more in the works.  One is a two bag order, and I'm not entirely sure I can reveal the details of that one just yet, but I will tell you this: these two bags are going to be insanely spectacular, out of this world.  This person is a very popular fabric designer and you are going to LOVE the line I'll be using for them!

{Betsy Travel Bag number two, my own personal bag}

For my bag, I used one of my all-time favorite fabrics by Echino.  I dream of living in England someday, so anything that has the Union Jack, London, Double Busses etc on it has me written all over it.  This is the bag on the pattern cover.  OMG I SAID PATTERN COVER!  Seriously, I am so excited about this pattern, can you tell??

{finished measurements are 20" wide x 12.5" high x 6.5" wide}

{the inside of the bag, nice and roomy with two pockets and a key fob that is sorta camouflaged by the lining}


The third bag was a very special bag.  I got to make it for one of my very best friend's out of her first fabric line.  She's a little bit rock 'n roll (don't tell her I said that because she's really just as goofy and dorky as me, SH!) so I decided to add some metal studs and use all gold hardware.

{the dynamic duo!  Katy and Me at QuiltCon 2015}
  
{Betsy Travel Bag number three for Katy Jones/I'm A Ginger Monkey}

{those studs gave it an edgy flair}

{Betsy, as seen in Katy's Priory Square/Art Gallery Fabrics booth at Fall Quilt Market 2014}

The fourth bag isn't quite finished yet, although it's almost there.  I only need to finish the binding and the lucky recipient will soon have it in her crazy talented hands!  I'm really loving how this one is turning out, and I know she's excited about it, too.  


I love that you can use big or unusual prints (hello Kokka, Tula Pink, Echino!) with this bag.  It has tons of pockets, lots of space, an easy space for stuffing and then accessing your book, wallet, airplane tickets etc.  You don't have to set your bag down every time you need to get into it, you just unhook a zipper binding and reach in.  Easy peasy. 


I purposely designed this bag to be floppy and squishable instead of stiff.  I didn't need it to stand up on it's own.  I DID need it to be easily stuffed under the seat in front of me on an airplane, or squashed into the last available space in the trunk of my car on a long road trip.  I wanted it to open up wide so it was easy to pack and unpack.  I also needed to make sure there was an inside zippered pocket to store my laptop, magazines, flip flops or even my dirty laundry.

{bonus key fob (in blue) so you won't lose your house keys while you're out of town!}

Most of all, I wanted this pattern to be easy enough for a confident beginner or an intermediate level sewist to be able to accomplish.  If you can sew a straight line, you can make this bag.  Even if your lines are a little bit wavy, don't worry about it!  The big prints will hide that!  (I've tried to think of it all, haha!) Even if you're not sure you can sew this bag confidently, don't worry too much about it.  We are hosting a Betsy Travel Bag sew-along on Rebel Craft Media's blog starting April 2.  There will be tons of participants (oh geez, I mean I hope there will be!) lots of helpful hints and inspirational pictures to browse and we'll be giving away two copies of the pattern! Use the hashtag "#thebetsytravelbag" on Instagram to play along.

You can purchase the presale pattern starting March 17, 2015 by clicking here. Presale purchasers will receive the supplies list which will give you two weeks to gather your hardware, fabrics, notions etc.  Speaking of hardware, we've made that pretty easy for you.  Claudia, of Snuggly Monkey, has put together a Betsy Bag Hardware Kit just for you. Click here to view/order one.


We have a pretty spectacular blog hop lined up for you.  You'll get to see Betsy through the eyes of the makers, pattern testers, owners and supporters! 

Happy Reading, Sewing, Supplies Gathering etc!
-Kristi

The Betsy Travel Bag Blog Hop Tour

March 17
Day One:
*Rebel Craft Media*

*schnitzel & boo*
www.schnitzelandboo.com

*Snuggly Monkey*

March 19
Day Two:
*Daisy & Jack*

March 21
Day Three:
*I'm A Ginger Monkey*

March 23
Day Four:
*Stitchy Quilt Stuff*

March 25
Day Five:
*Libby Dibby*

March 27
Day Six:
*Euphoria Jessica*

March 29
Day Seven:
*Karri of Berries*

March 31
Day Eight:
*Rebel Craft Media*
(photo round up)


Saturday, November 15, 2014

Organizing, wow.

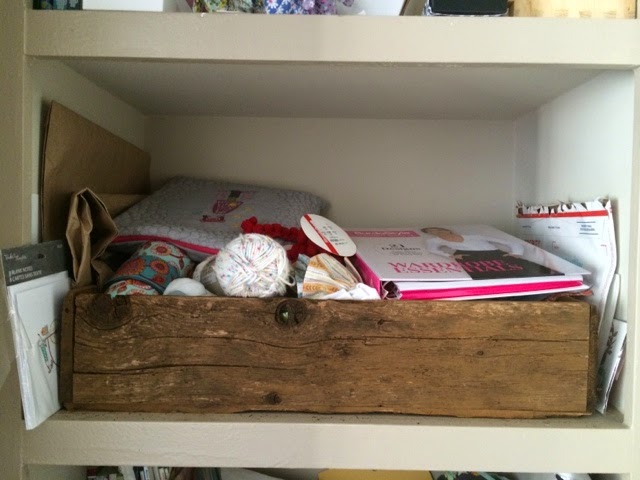
I have a confession...I'm terribly unorganized. I can basically keep my house clean (not organized) with the exception of my bedroom. I will always close the door on that room. Always. What a pig sty!

My sewing room is another story. I have friends over all the time that come to sew with me. I can't keep it messy or they'd stop visiting. So what do I do? Shove everything in the closet or the shelf, of course!

Behold:
{that ain't pretty}

Well, lucky me, I was asked to try out a new product by Polar Notions/Paper Pieces.

The perfect opportunity to tackle at least one of my problem areas! I was both excited to try these out and terrified at the same time. Excited because I could straighten out that shelf and make it pretty! Terrified because well, I had to straighten out that shelf and make it pretty! Haha

Want some close ups? Sure you do. Check this out...

That's just downright frightening!
I mean, seriously, how does one find anything in there??

That iron doesn't even work, you know. Shameful...

Well, so I pulled everything off the shelves, threw out the trash and nonsense, found some stuff that I'd been missing for quite some time (oh hello, unopened bag of Skittles and hello, cute little sewing machine print that I thought was lost forever!) and put some bins to good use, rather than have them sit empty or unorganized.

The result?
Much better, huh?

The best part was being able to fold up a stack of fabric and display it up there on
The top shelf. How about a better shot:

Isn't that fun? They were so easy to use. I went on YouTube and searched "Polar Notions" for directions. In no time I had a neat little stack of GeoFabulous on mini bolts.

These bolts can hold up to 15 yards of fabric and be only 3" wide, how cool is that?? I don't actually have 15 yards of anything, but if I did I would definitely roll it around one of these little magical bolts. That's so much easier and nicer than wadding it up and stuffing it wherever it'll fit!

{info so you can grab a set or two}

I wish I had about 5 dozen more of these! My shelves would look even prettier!

Oh! Before I go, I should tell you that Paper Pieces is offering all Schnitzel & Boo Mini Quilt Swap participants a 20% discount on your entire shopping cart until February 1, 2015. Use the information below to get your savings.
Happy organizing!
Kristi 


PS Stay tuned for information on how to win a set of your own!

Monday, July 02, 2012

Tutorial: Flour Sack Snack Bag

I made a deal with my friend before I went to Kansas City for Quilt Market.  If she could watch The Roo before and after school for a few days while I was gone, I'd trade her for a sewing project or two.  She didn't even hesitate.  In fact, I'm pretty sure she said "Can you make me a few reusable snack bags?" before she even agreed to watch her.

At first she asked if they could be made out of vinyl or plastic so that they could be wiped out, but after discussing food safe vs. chemical laden plastic etc, we both decided that just plain ol' fabric 'n velcro bags would be the best.  Then I decided (on my own) that I was going to make the bags out of a flour sack towel because well, shoot-they had to be food safe that way, right? 

At first I was going to make these bags lined, but then decided against it for a couple of reasons.  I figured that an unlined bag would be easier to keep cleaner longer (no crumbs and food dust to get caught between the lining and outside layers, gross!) and also, I didn't want the bag to be too bulky.  (It needed to stay lightweight and compact enough for your child's lunch bag or your pocket.)

Before I set to work, I thought of just one more thing...French seams.  I definitely didn't want loose threads or trapped lint to get all wrapped up in her grapes so I knew I had to finish the raw edges but skip the serger.  As soon as all of the details were worked out, I sat down to complete my first snack bag and about twenty minutes later I was done!

So are you ready to make your own? 

Finished Snack Bag size: 9 3/4" x 6"

What you will need:
-Flour Sack towels (I found mine in a four-pack at Target for about $5)
-Scrap fabric about 3"x13"
-Thread
-Velcro
-Pen and Grid Ruler

What you will do:
Fold towel in half, then in half again (creating four equal squares) and press.


You can see that the towel was probably not totally square to begin with as you may have wonky edges.  This is okay, use your grid ruler to draw a straight line on both UNFOLDED edges; trim carefully on the straight line.  You may want to pin the layers together to prevent sliding. (I decided to skip that step.)


You will have four separate towel squares, but you will only need one.

Fold the square in half and press.  This will create a center guideline for your scrap fabric strip.


To finish the fabric strip, fold the long raw edges of the strip to the inside 1/2" and press.


Pin the strip carefully to the center of the square, using your center fold line as a guide.


Carefully edge-stitch the strip in place, 1/16" on all four sides.


Now, this is where it's going to "feel" strange.  With WRONG sides together, fold square in half, pin both short sides together and stitch, using a 1/2" seam allowance.


Very carefully trim the bottom corners off the bag.


Turn bag wrong side out and press.


Stitch the sides again, this time using a 3/4" seam allowance.


Without turning the bag right side out yet, press seams towards the sides.


Now, turn the top edge under 1/2", all the way around, and press.  (Again, the bag has not yet been turned right side out.)


Cut a piece of velcro the length of the bag opening minus 1/4".  For example, if the bag is 10" long across the top, cut your velcro 9 3/4".  Pin or glue the soft side velcro in place, then carefully edgestitch along all four sides.


Repeat the last step for the hard side velcro on the other side of the bag.


Turn bag right side out, poke out the corners and voila!  You're done!


If I wasn't giving this one away, I would have filled it up with snacks to show you how awesome and useful it is.  No more landfill plastic baggies, no more wasting your money on a throw-away item.  Doesn't that feel good? 

Happy sewing!
-Kristi-

Monday, December 26, 2011

Tutorial: Busy Kit for a Busy Kid

Hi!  Guess what?  I wrote a little tutorial for Riley Blake Fabrics and it's set to post tomorrow!  I am so excited for you guys to see it.  I must admit, it was a little tough squeezing it in with all of the Holiday hullabaloo going on, plus the crazy-abundant etsy orders (they just keep coming, yay!) and the Christmas present sewing.  But, I found the time and I managed to put together a cute little project that I think you will enjoy.  Especially if you have little crafty souls in your life.  How's about a little sneak peek?  Stay tuned tomorrow for the direct link...


See you soon!
-Kristi