

Recently, I released my first "official" published pattern, The Betsy Travel Bag, which you probably already know. Right around all of this excitement, I was making a bunch of these bags, including one that I donated as a prize for The Stash Bash.

I had big plans to make another bag while at The Stash Bash, but somehow I got caught up in this:

The thing is, Betsy has a lot of pieces and fabrics so I wanted a way to keep it organized and easily accessible. So, I made a vinyl pouch. I picked up a one yard remnant of 8mm clear vinyl at JoAnn's during one of my MANY trips for zippers, thread, interfacing etc.
When I got home, I sat down and turned out three pouches in about an hour and a half. Pretty impressive, right? These pouches are fast, easy and so darn satisfying. If you're headed to a retreat, you have to make one (or five!) of these pouches.
You will need:
1/2 yard accent fabric
1/2 yard 8mm clear vinyl
16" length of 3/4" Velcro
9" length of 1/4" elastic
Thread
Walking foot
Fabric marker
Grid ruler
The usual sewing accoutrements

{equinox by ana davis for blend fabrics}
Cutting
Vinyl
*cut two 18"x24", front/back
Accent
*cut two 4"x19" pouch tops
*cut one 4"x14" side tab
*cut two 8"x12" pocket
Directions
*Seam allowance is 1/2" unless noted*
**using a walking foot is HIGHLY recommended for this project**
With wrong sides together, fold pouch tops together, matching long edges; press.

Unfold tops. Using a fabric marker and a grid ruler, measure and mark 1" along both long edges.


Turn raw edge to marked line and press.
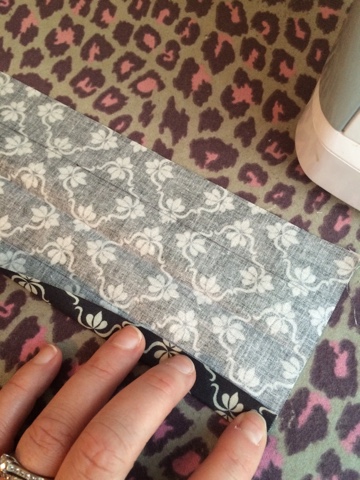
Repeat for the other side and remaining pouch top.

Refold top along the center crease. Find the center of the tops and the 18" side of both pouch pieces; finger press or place a pin at center.
Unfold the pouch top and place it on your work surface. Align the centers of vinyl with top carefully fold the top over, making sure the vinyl is pushed up all the way inside the crease.

Pin in place.

Edgestitch about 1/8" from finished edge of pouch top.

Trim excess.

Measure in about 3/4" from both edges of the pocket top, make a mark with a pin or fabric marker. Align the end of one of the Velcro pieces on this line, Edgestitch in place.


To make the tabs, you will be doing what I call "the fold and fold" technique. Basically, with wrong sides together, fold and press along the center, having raw edges of long sides matched.

Unfold the tab, align one long edge along the center crease; press.

Repeat for the second edge.

Refold along the center line; press.

Edgestitch both long sides of the tab about 1/8" from edge.

Fold the tab, matching short edges and cut in half (not shown, in the photos above, I cut the tab in half to demonstrate the fold and fold technique) Set tabs aside.
With right sides together, stitch pocket all the way around all four sides, leaving a 3" opening at the bottom for turning. Be sure to backstitch on both sides of opening!
Clip the corners, turn pocket right side out; press. Lay pocket lining side up, using a grid ruler, measure 1 1/2" along top edge of pocket, draw a line.

Turn top edge of pocket to meet the line; press. Edgestitch in place, making sure to backstitch on both sides. Don't sew the sides shut! Only sew along the edge of the pocket top (along the drawn line).

With lining sides together, fold pocket in half, matching the short sides. Draw a 1" line parallel to center fold; stitch along this line, making sure to backstitch.

Align the center line along the seam line; press.

Insert elastic into opening of the pocket top; stitch in place on both sides.

Using your cutting mat as a guide, lay the pocket, lining side down, 2 1/2" down from top of pocket along the INSIDE of one vinyl piece, making sure centers are matched. Pin in place along stitch line (see photo for pin placement. I pinned it this way to hide the pinholes better.) Edgestitch in place, remembering to backstitch, of course.

Place right sides of vinyl pieces together. Measure down about 3/4" from bottom edge of pouch top, fold tab in half (matching short edges) and insert between vinyl pieces. (The raw edges should match up with sides of pouch.) It will be difficult to pin these layers together, so consider using a binder or clover clip for this part; stitch sides and you know the drill...use a backstitch.

Now, let's box the corners. Using your grid ruler, measure 1/2" up from bottom at fold and 1/2" in from the seam allowance at the side. It's going to look off balance, but trust me, this is correct. Use a ball point pin to mark these lines. Cut the squares out with a sharp pair of scissors.

Open out the pouch bottom, match the seam with the bottom center; stitch. Backstitch, you got it.

Carefully turn the pouch right side out. It's going to be challenging because the vinyl is stiff and tends to stick to itself. Don't worry about wrinkling the vinyl, there's not much you can do about it anyway. All you can do is tell yourself that it's going to get wrinkles during use anyway, right?
Now, step back and enjoy your handy work. You just made that! Think of how organized you're going to be at your guild meeting/sewing retreat/friend's house!

Heck, these don't have to be exclusive for quilting/sewing/crafting projects! Use them as an overnight bag for the kiddos or as a beach bag for soggy swimsuits. Just don't forget to unpack them, huh?
Happy Sewing!
-Kristi-
I need to make this...great idea!
ReplyDeleteI love this! Think I will make one to keep my small world QAL stuff in!
ReplyDeleteYou know how inept I am at pattern comprehension. I'm going to try this though! I still need to finish my BTB!!
ReplyDelete