Thursday, August 01, 2019

Life: Being Vegetarian

On Being Vegetarian...


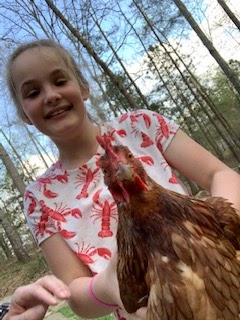
My daughter has always been one of those quick-to-get it kids. She figured out at a pretty young age (five years old) that chicken nuggets aren't some fantasy labeled food, but is actually the meat of a real, used-to-be-live chicken, a fact that made her feel pretty bad. She would tell me that she didn't want to eat an animal and she would say things like "Do you think his mommy misses him?" or "Why did this animal have to die?" She is a very compassionate child, with a very big heart for all living creatures-whether they are animals, insects, humans or toys (because in her eyes, they are real, too!) I could see how much it bothered her, so one evening I explained to her what being a vegetarian was. I told her that we could be vegetarians but also said "That doesn't mean you get to eat mac and cheese or peanut butter jelly sandwiches every single day, it means you have to eat vegetables and be willing to try new things." I told her that if she wanted to be vegetarian, I would happily support her decision and do it with her. She is now ten years old and we keep finding ways to support the lives of our furry, scaled and feathered friends every day!

There are several obstacles about being vegetarian, even more if you're vegan. We are working towards a vegan diet, but are currently selectively dairy-free vegetarian. (We don't eat dairy products if it has Vitamin A Palmitate, or doesn't specify rennetless or plant based enzymes.) We don't like to eat a lot of substitute foods (like tofu, plant based "meat" or soy based products like "cheese" or veggie dogs.) One of the most common questions I get is "But what do you eat??" Well, we eat everything but meat, or things made from animal by-products. I have a Pinterest board with lots of recipes that are either vegetarian, vegan or adaptable as such. Eating at a restaurant is often challenging, especially here in the south. There's just not a lot of choices. Most of the time, we are offered side dishes or we're told we can "just take the meat off" when we are ordering our food. My daughter doesn't like lettuce at all, and since we don't eat cheese, the traditional kid-fair of grilled cheese, quesadillas or macaroni and cheese choices are not an option. We now have a select few restaurants where we can get a good meal. For the most part, though, we cook at home. My daughter cooks with me and she loves it. She has learned to try everything and give it a second chance, if she didn't like something the first time. Steamed asparagus wasn't her favorite but she loves it sauteed in coconut oil and sprinkled with lemon. She used to turn her nose up at cauliflower or broccoli, but now she gobbles them both with no complaints! In fact, she orders broccoli instead of fries-unless they have brussel sprouts on the menu! That kid loves brussel sprouts!


Recently, I've had a lot of people ask me how to get started, or ask for book recommendations so they can incorporate a meat free meal into their repertoire. I have several books that I love, but today I am going to leave you with a link for the one that got us going. It is my very favorite vegetarian cookbook because it is sorta like cooking school. You can cook your way through this book and, at the same time, learn new techniques, names of veggies you've probably never heard of, different types of cuisines, how to adapt a recipe, how to make vegan substitutions and even things like what goes into cheese-making or how to make your own tofu. This book is seriously good stuff.

I'm hoping to feature my favorite recipe next week sometime (it's the one on the cover) but I have to get to the farmer's market for some heirloom tomatoes first!


I really need to do a more in depth post about our animal-friendly lifestyle. I'll try to do it when I have more time, but until then, here is a short-and-sweet informative link that may surprise you. In today's world, where there's a lot of smoke and mirrors, it's good to be informed. Take a moment to really find out what you are eating and how you can improve. Make simple switches-like, buy a few apples instead of a candy bar or box of donuts. Not only are you making a smarter decision for your health, you are also supporting the farmers of the world! Without farmers, we have no food!

Happy living!
-Kristi


Monday, July 22, 2019

Sew A Softie Tutorial: How To Make A Twirly Skirt For An 18" Doll


This is my third time participating in the Sew A Softie Blog Hop, which is the creative brain child of Trixi from Coloured Buttons. I really love this program, because it combines two of my favorite things: sewing and teaching. Sew A Softie is geared towards teaching people of all ages how to sew, sharpen their skills or to learn a new technique. It's even great for those of us that can sew just about anything but just want a simple, adorable, or quick project to make. 


Today, I will be demonstrating how to make a very easy twirly skirt for an 18" doll. This skirt is designed to fit American Girl, Our Generation, My Life or any other similar doll. This is a scrap and/or fat quarter friendly project-which is good because that means you probably have everything you need to get started! If you don't, or you're using this skirt to teach a new student, this is a very low cost project to start with. How great is that??


For this project, you will need:
-1/4" elastic, at least 11" in length
-Main Fabric, a Fat Quarter is perfect
-Accent Fabric, scraps are excellent
-thread
-safety pin, extra-large dull needle or elastic puller
-pins, fabric marker, ruler, scissors, sewing machine, iron and ironing board

**Seam Allowance is 1/2", unless otherwise noted** 
Begin by pressing both fabrics. Then cut the following pieces:

From Main Fabric 
(measurements are given vertical x horizon for easy directional print cutting)
-Cut Two  a 5 1/2" x 15 1/2" (front & back of skirt)

From Accent Fabric
(measurements are given vertical x horizon for easy directional print cutting)
-Cut Two at 1 3/4" x 12" (waistband)
-Cut Two at 2 1/2" x 15 1/2" (hem)

Cut one piece of 1/4" elastic at 11"


Set the stitch length on your machine at 2.0 or 2.5, make sure your bobbin is full, you have a new needle in place, your machine is threaded correctly and you know where your 1/2" seam allowance is on the throat plate. Here we go!

With right sides together, sew both side seams (the short ends) of the hem.


 Press each seam open, then, with wrong sides together, fold the length of the hem all the way around, pressing as you go.


With right sides together, sew both side seams (the short sides) of skirt front and back; press seams open. 


Usually, I prefer to press seams to the side (towards the back of the garment) but since we will be adding this type of hem to the bottom of the skirt, I choose to press the seam open. Doing this lessens the bulk of the side seams, making it easier to sew together and topstitch later on.


Now, turn the skirt right side out and match the side seams together. Fold the skirt in half and finger press. This gives you a center front and center back mark; put a pin in place here, or mark with a fabric friendly pencil. 

If you're using a solid, it won't matter which way you place the hem along the bottom of the skirt. If you're using a print, pay attention to the direction the fabric is going. You don't want to end up with an upside down hem! I forgot to take a picture of this step, so I'll do my best to explain it. Keeping the skirt right side out, insert it inside the circle of the hem; pin in place, then stitch together, keeping the side seams, center marks and raw edges even.


Press seam towards the top of the skirt, then adjust the stitch length to 3.0, then topstitch 1/4" away from seamline.


Set your machines stitch length to the biggest it can go, usually that is 4.0-5.0. Beginning at a few stitch lengths after the side seam, and making sure you have about 3"-4" of a thread "tail" sew a line of stitches 1/4" away from top edge of skirt. Make sure to stop just shy of the next side seam, and leave a "tail" of top and bobbin thread about 4" long. Repeat for the other side of the skirt. (I forgot a picture for this step, too, can you believe that?) Set the skirt aside so you can work on the waistband.

With right sides together, sew just one side seam (the short edge). One the other side, measure up and in 1/4" from the bottom and side edges; make a small mark using your fabric pencil.


 Measure up 3/4" from this spot, make another mark. You will not sew the seam between these two marks. Stitch the waistband on either side of the mark, making sure to backstitch on either side and at the edge of the fabric. Backstitching will strengthen the seams for when you put stress on it while inserting the elastic. Press both side seams open, then fold and press in the same way you did as the hem. Mark the center front and center back using your pencil or pins.


Follow the same directions as the hem to attach the waistband to the top of the skirt. Remember to keep directional prints in mind! To get the skirt to fit inside the waistband, pull up either the tail of the bobbin thread OR the tail of the top thread, but not both. Pulling the thread will cause your fabric to gather along the stitch line, allowing you to adjust it to fit. Use as many pins as necessary to keep the raw edges even so you can make a neat seamline.


 If you haven't alraeady done so, adjust thestitch length back down to 2.5-3.0 and sew the waistband in place. Go slowly, and be extra careful not to catch the skirt in the seamline. Adjust the fabric as you go along.

Insert the elastic through the opening you left in the side seam of the waistband using a safety pin, extra large needle or thread puller. Be very careful not to pull the other end of the elastic inside the opening or you'll have to start over. I like to pin the end to the skirt near the opening of the waistband to prevent that from happening. Sew the ends of the elastic together, then adjust the gathers along the waistband.


All that's left to do now is to hand stitch that little opening shut and you're done!


Now that you've made one, the next will go a lot faster. Before you know it, you'll have a whole collection of scrap busting twirly skirts! What a great gift to give at the next child's birthday party. You and/or your child can make a few in an evening and stash them away until the next time you need a gift!


Thanks for following along! Make sure to take a look at the other participants in the blog hop, there are some seriously fabulous projects coming out of this tour! Click here to be taken to the Sew A Softie website. 


Monday, March 18, 2019

Posy Patch Quilt Block Tutorial

So, it's been like a thousand years since I last posted here. But there's been so much happening, so many changes in my life that I had to let some things go. My blog being one of them. I have lots to update and share but, for now, this post is all about a new quilt block:


The Posy Patch

You will need:
-one 2"xWOF strip of Petal Fabric
*subcut into 20 2" squares
-one 1"x20" strip of Flower Center Fabric
*subcut into 20 1" squares
-one 1"xWOF strip of Background Fabric
*subcut into 40 1" squares
-one 3.5"x14" strip of Background Fabric
*subcut into 4 3.5" squares

-Grid ruler
-Fabric marking pencil, pen or hera marker
*optional spray starch but I highly recommend it!

To assemble:
-Using the grid ruler and marking tool of choice, draw a diagonal line on the wrong side of each Flower Center square. Using the photo below as a guide, with right sides together, align the center squares in the corner of the Flower Petal squares; stitch directly on the line. Press seams, then trim seam allowance and press seam towards the darker fabric. Once you've done this, spray the square lightly with spray starch and press again.


The following pictures show the difference between squares pressed with spray starch and squares without:

{the column on the right was pressed with spray starch}

{the bottom row was pressed without spray starch, quite a difference!}

Not only will using spray starch give you a flatter piece of fabric to work with, it increases accuracy by helping to prevent stretching, bunching and shifting under the foot by giving the fabric stability.


Next, on the wrong side of the fabric, draw a diagonal line on the back of each 1" background square. Use the photo below as a guide to align these pieces, right sides together, with the Flower Petal squares.


Sew directly on the line; press seam line, trim seam allowance then press seam to the side. Press again with spray starch, if using.

{each petal square measures 2"}

Use a scant 1/4" to sew the squares together. If you aren't sure what  scant 1/4"should look like, here is an example:


Sew the top and bottom center seams; press seams in opposite directions so you can "nest" them together when sewing the middle seam.


Press middle seam open to help it lie flat.


{each flower measures 3.5" square}
Use the photos below as a guide to assemble the Posy Patch:


Give the block one final press and you're done!

{each flower patch measures 9.5" square}

This block is meant as an alternative for the March block in the Gnome At Home Block of the Month. For more information about Gnome At Home, click here

{Gnome At Home BOM}


Happy sewing!

Tuesday, January 30, 2018

MEOW: a Candy Cat Quilt Along Free Pattern/Tutorial


Hello, again! 
As promised, I am back to post my free tutorial for MEOW, a simple patchwork pattern to accompany the Candy Cats from Unicorn Harts. In case you missed it, I am hosting a free Instagram based Quilt Along. Click here all the important information and get ready to join us in making a whole litterful of kitties! There is no sign up required, just jump in and have fun.

To make MEOW, you will need:
-Large scraps of a background fabric and four different coordinating fabrics. 
**I suppose you could  make them all the same, but it might be hard to read, unless you put a background strip in between each letter. Something to consider when choosing your fabrics, right?**
-ruler
-fabric pen
**although, the pen marks won't be seen so you could use a regular ol' ball point, like me**
-all the usual machine sewing accoutrements


Now, let's get started...

For the M, cut the following from M fabric
-TWO 2 1/2"x9 1/2"
-ONE 5 1/2"x2 1/2"
-FOUR 1 7/8"x1 7/8"
You will need the following from Background fabric:
-ONE 2 1/2" square
-ONE 3 1/4" square

For the E, cut the following from E fabric:
-ONE 2 1/2"x9 1/2"
-ONE 3 1/2"x2 1/2"
-TWO 4 1/2"x2 1/2"
You will need the following from Background fabric:
-TWO 1 1/2"x4 1/2"
-ONE 3 1/2"x 2 1/2"

For the O, cut the following from O fabric:
-FOUR 2 1/2"x2 1/2"
-TWO 2 1/2"x3 1/2"
-TWO 2 1/2"x5 1/2"
You will need the following from Background fabric:
-FOUR 2 1/2"squares
-ONE 2 1/2"x 3 1/2"

For the W, cut the following from W fabric:
-TWO 2 1/2"x9 1/2"
-ONE 2 1/2"x5 1/2"
-FOUR 1 7/8"x 1 7/8"
You will need the following from Background fabric:
-ONE 2 1/2" square
-TWO 1 1/2" squares
-ONE 3 1/4" square


Label your pieces to make it easier to put it all together, if you like. 
I didn't do this, but I do reccomend it!

On the back of the letter M 1 7/8" squares, draw a diagonal line from corner to corner on all four pieces:

To make the flying geese, with right sides together, lay two 1 7/8" squares on top of the 3 1/4" square. 
Sew a scant 1/4" seam on both sides of the line.

Using a rotary cutter, cut on the line you drew:

Press the triangles out, being careful not to stretch the fabric:

Place another square in the corner as shown, sew a scant 1/4" seam on both sides of the line:

 Using your rotary cutter and acrylic ruler, cut along the drawn line and press:


Arrange the M pieces as shown; stitch using a scant 1/4" seam to sew the flying geese to the 5 1/2"x 2 1/2" strip. Press the seam toward the strip for a flatter block. Sew the 2 1/2" square to the bottom of the center strip. Once the center strip is sewn, stitch the 2 1/2"x9 1/2" strip to either side. Press seam away from center strip:

For the letter E, arrange pieces as shown:

Stitch the 1 1/2"x 4 1/2" background pieces to the 2 1/2"x 4 1/2" E pieces, then stitch the 2 1/2"x 3 1/2" background and E pieces together, pressing seams towards the darker fabric. Stitch the sections together, using the photo below as a guide:

For the O, arrange the fabric as shown. Draw a diagonal line on the wrong side of the 2 1/2" E squares; place right sides together on the 2 1/2" background squares:
{totally not the right layout in the center, see third photo down for correct representation}

Stitch directly on the line:
(I chain stitch whenever possible!)

If you have one of these handy little thread cutter gadgets, you can quickly separate your blocks without having to put down and pick up your snips a bunch of times. (I HIGHLY RECCOMEND THIS TOOL!) Trim the seam; press the triangle out being careful not to stretch the fabric.

Stitch the pieces you just made to the top and bottom of each 2 1/2"x 5 1/2" piece; press seam toward the center:

Stitch the center as shown, pressing seam toward the darker fabric; stitch the sides to the center, pressing seams toward the center:

For the W, make flying geese as described in letter M. Draw a diagonal line on the wrong side of both 1 1/2" background squares, place in the outside bottom corners of the 2 1/2"x9 1/2" W strips; sew directly on the line. Trim seam to 1/4", press towards darker fabric.
 Follow the same instructions for letter M to assemble the W.


Assuming all went well, you now have a finished MEOW! I am waiting to sew mine together until I have made a decision on the quilt layout. Each two letters measures 12"x9" finished, the same measurement as the Candy Cat. Be on the lookout for a possible FPP pattern from Jo of a smaller version of this! 


Don't forget to follow and/or tag us, @unicornharts and @schnitzelandboo and our sponsor @thecottonfarmlongarm on Instagram. 
Stay tuned for more free patterns to accompany this quilt along! 

Happy sewing!
-Kristi